

Filters
Filters in Your Marketplace
Filters help users quickly refine search results and discover partners that best meet their needs. They are designed to improve user experience and navigation, but do not create unique landing pages or impact SEO rankings.
Where to Find Filters
Navigate to:
Settings → Taxonomies → Filters
Creating and Managing Filters
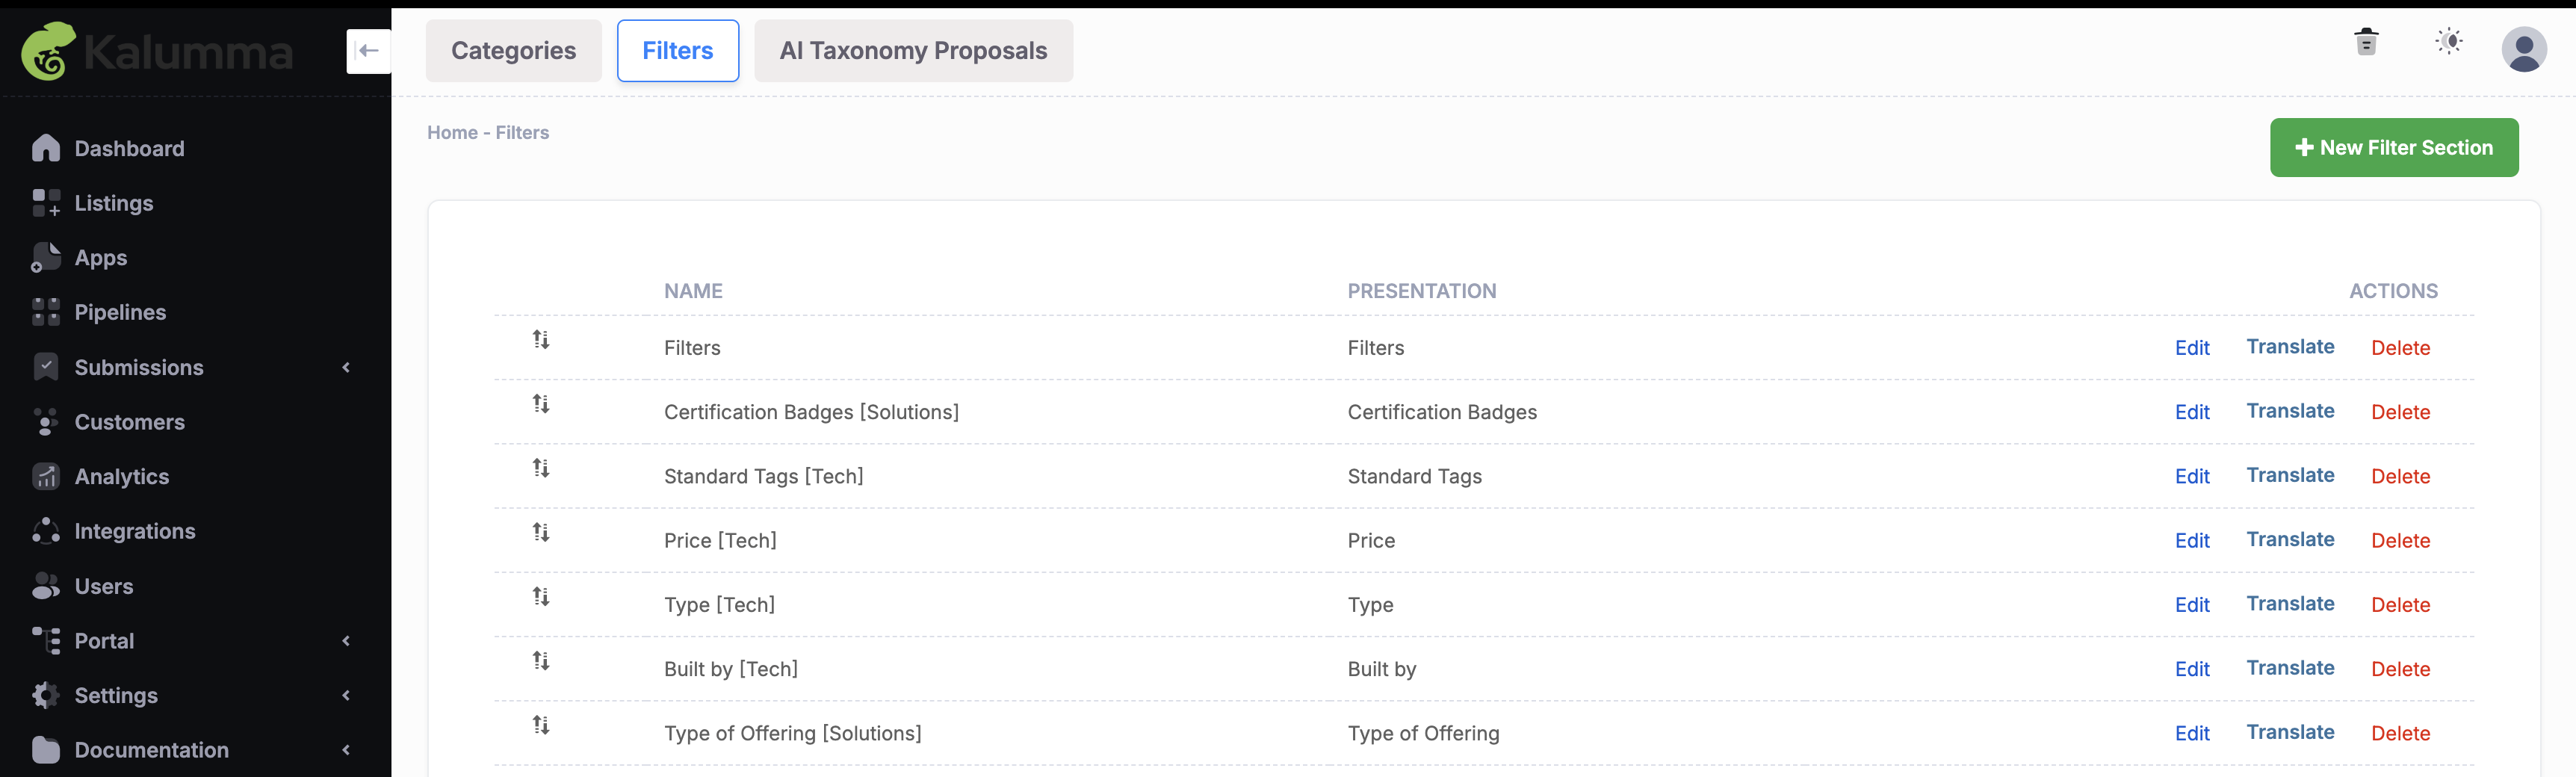
Add a New Filter Section
- Click the green button + New Filter Section.
- Enter the details for your new filter.
- Save changes.
Edit an Existing Filter
- Click Edit next to the filter you’d like to update.
Delete a Filter
- Click Delete to remove a filter section permanently.
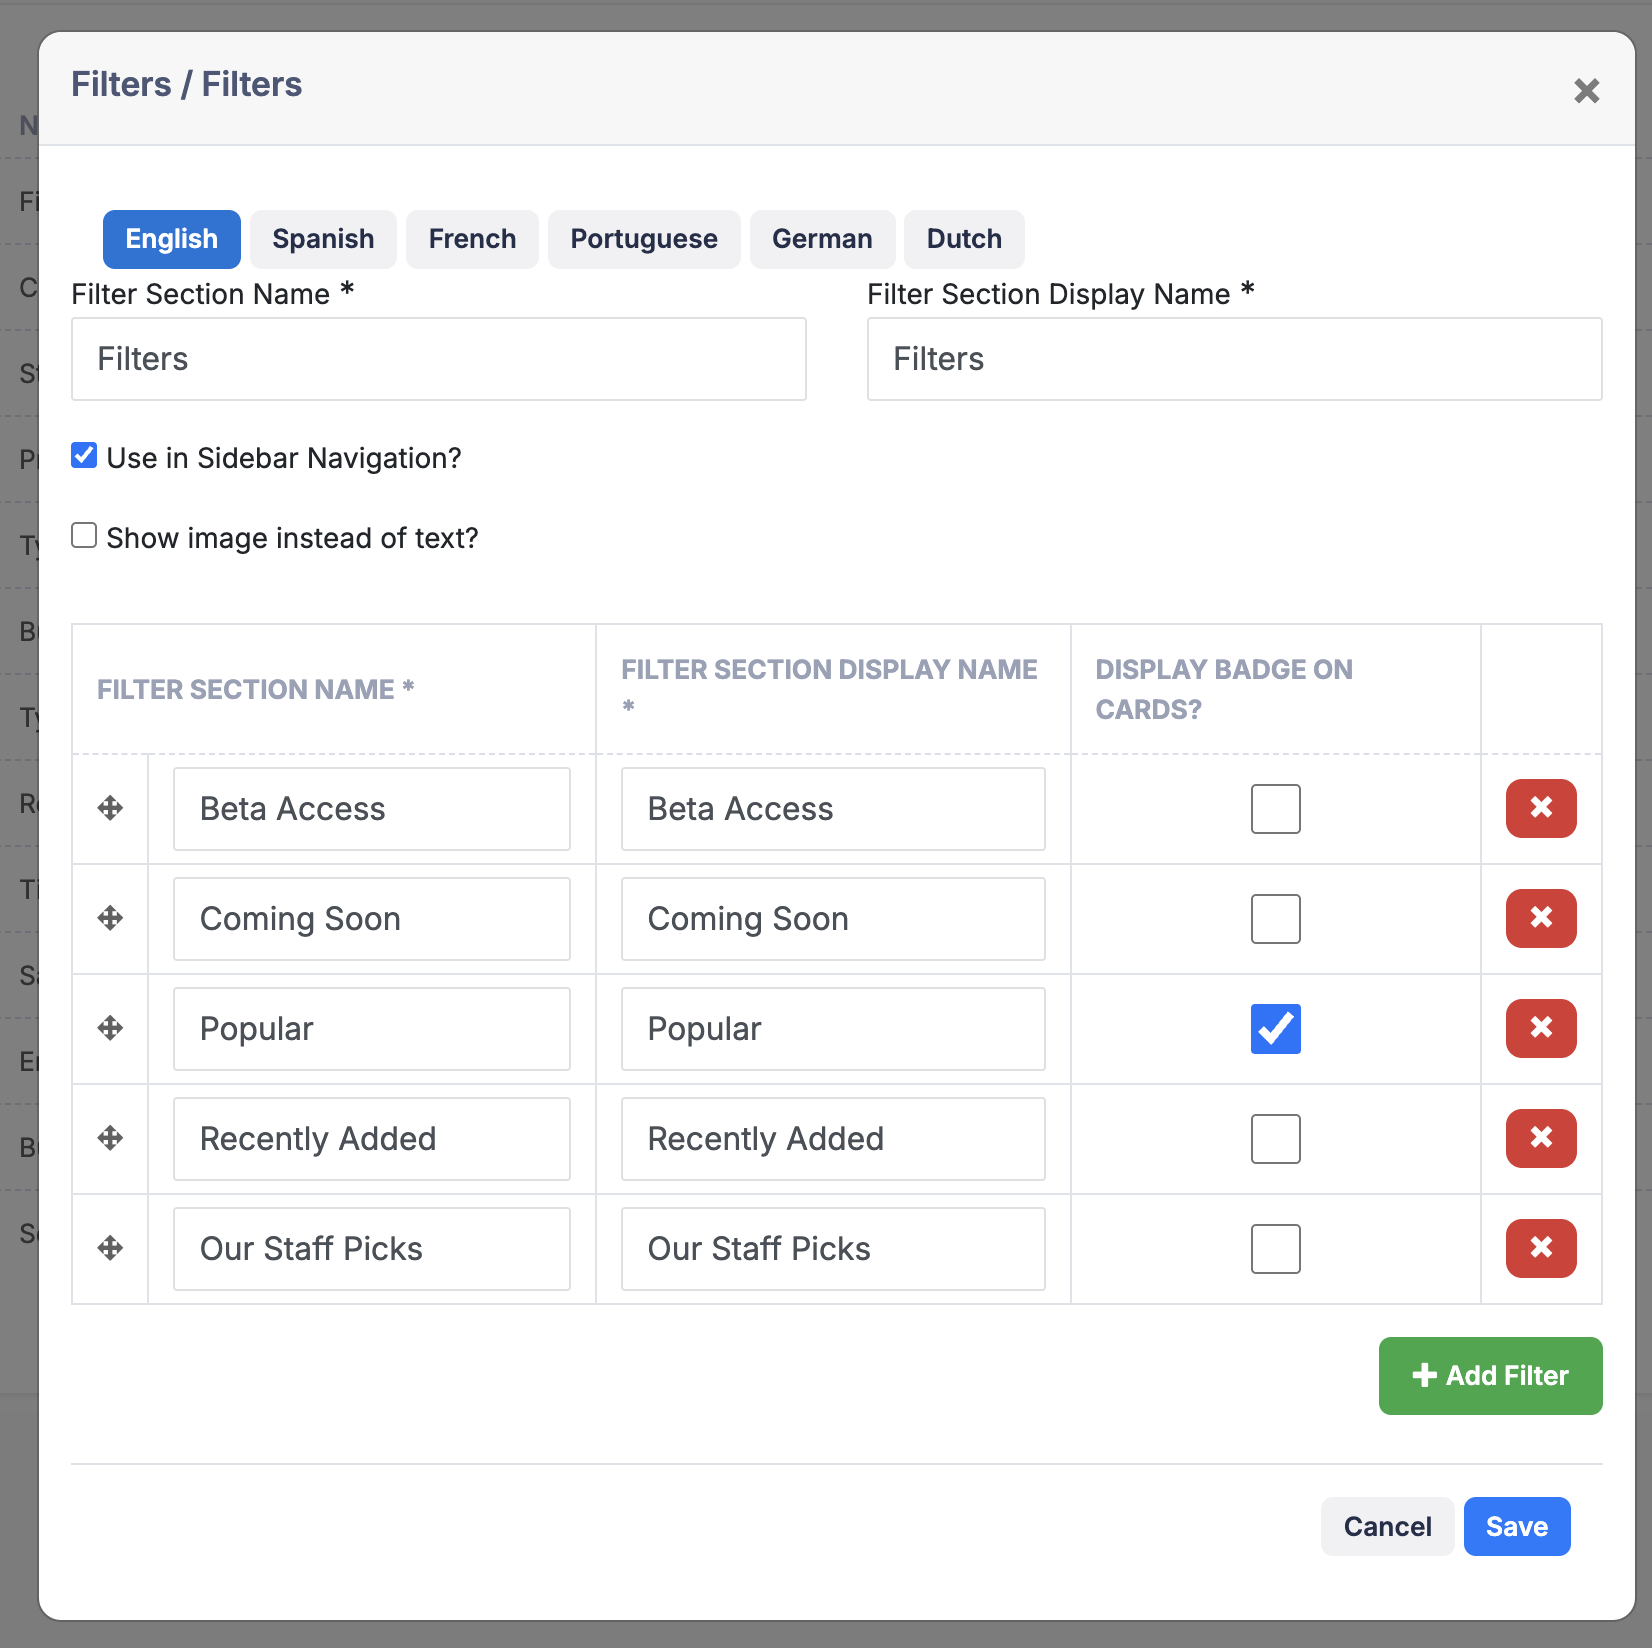
To ensure a filter is visible on the front end, select the "Use in Sidebar Navigation?" checkbox. This step activates the filter in the sidebar, enhancing navigation and making it easy for users to refine searches directly from any page, which improves marketplace accessibility and user experience.
Naming Filters
Each filter section can have two names:
Section Name (Internal)
- Used in the backend for organization and management.
Display Name (User-Facing)
- Shown to users on the marketplace front end. Helps ensure clarity and consistency for partners and visitors.
You can use the same name for both if you’d like. However, keeping them separate can be useful—especially if you want your backend structures to remain organized without affecting the simplicity and usability of the front end.
Making Filters Visible in the Marketplace
Filters must be configured in two places before they appear to users on the front end:
- Sidebar Navigation
- Marketplace & Listing Templates
Step 1: Enable Sidebar Navigation
To display a filter in the left-hand sidebar of your marketplace:
- Go to Settings → Taxonomies → Filters.
- Select the checkbox Use in Sidebar Navigation. (see screenshot above)
Step 2: Add the Filter to Your Marketplace
To ensure filters appear on the homepage:
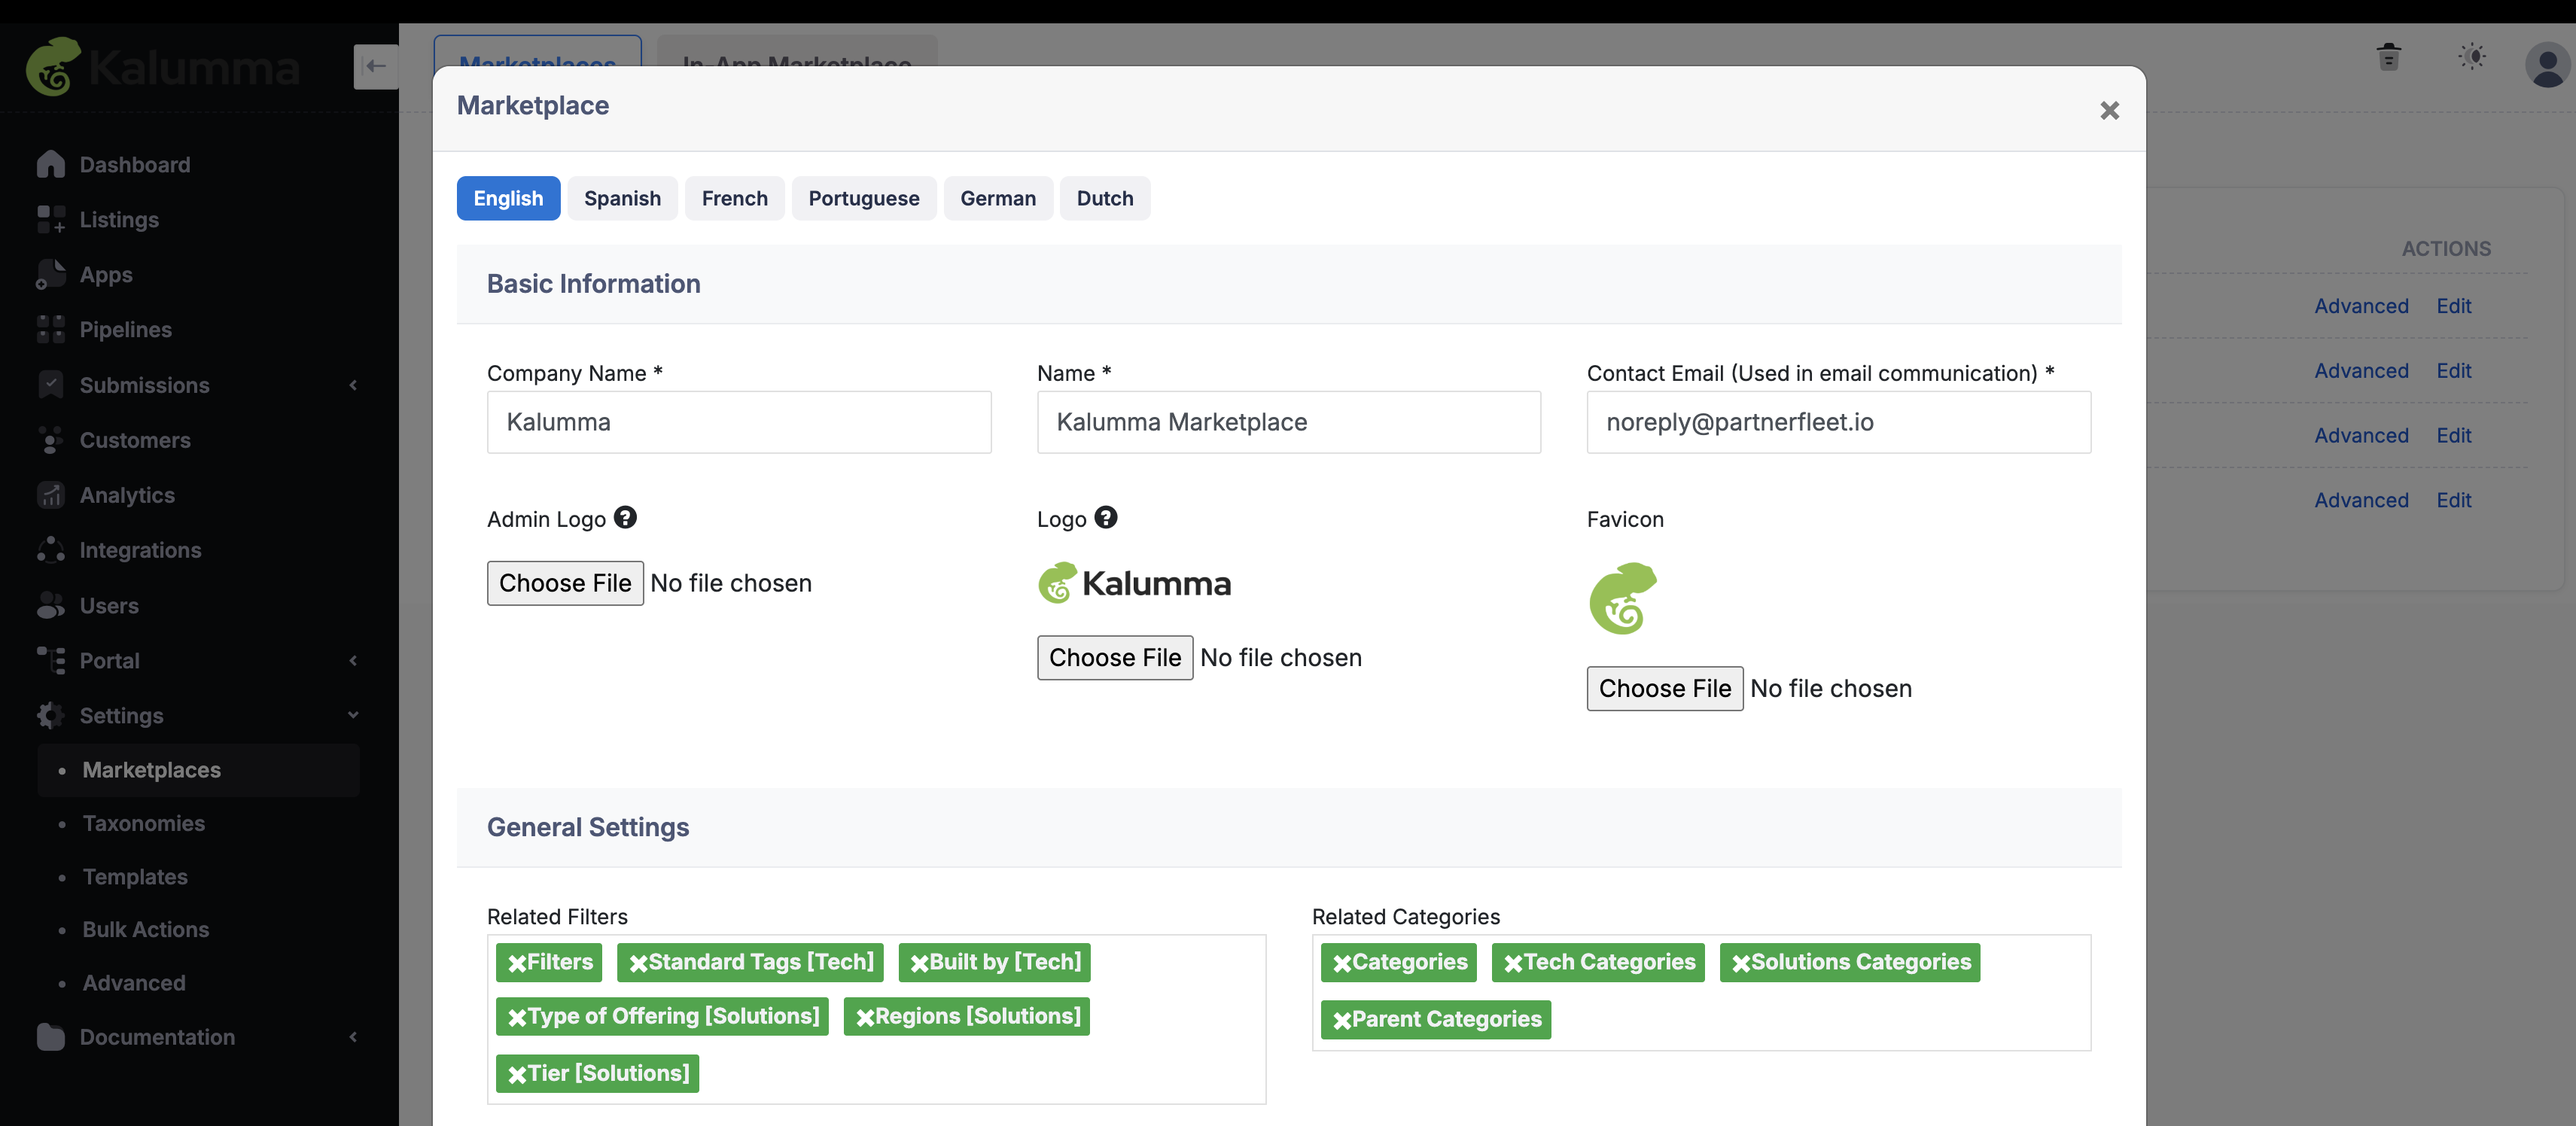
- Navigate to Settings → Marketplaces.
- Select the marketplace you want to edit.
- Add the desired filters to the marketplace configuration.
This makes the filter visible to users in the navigation panel, allowing them to refine results from any page. It’s one of the most effective ways to improve marketplace accessibility and discoverability.
Step 3: Configure Filters for Listings
To make filters available within partner listings:
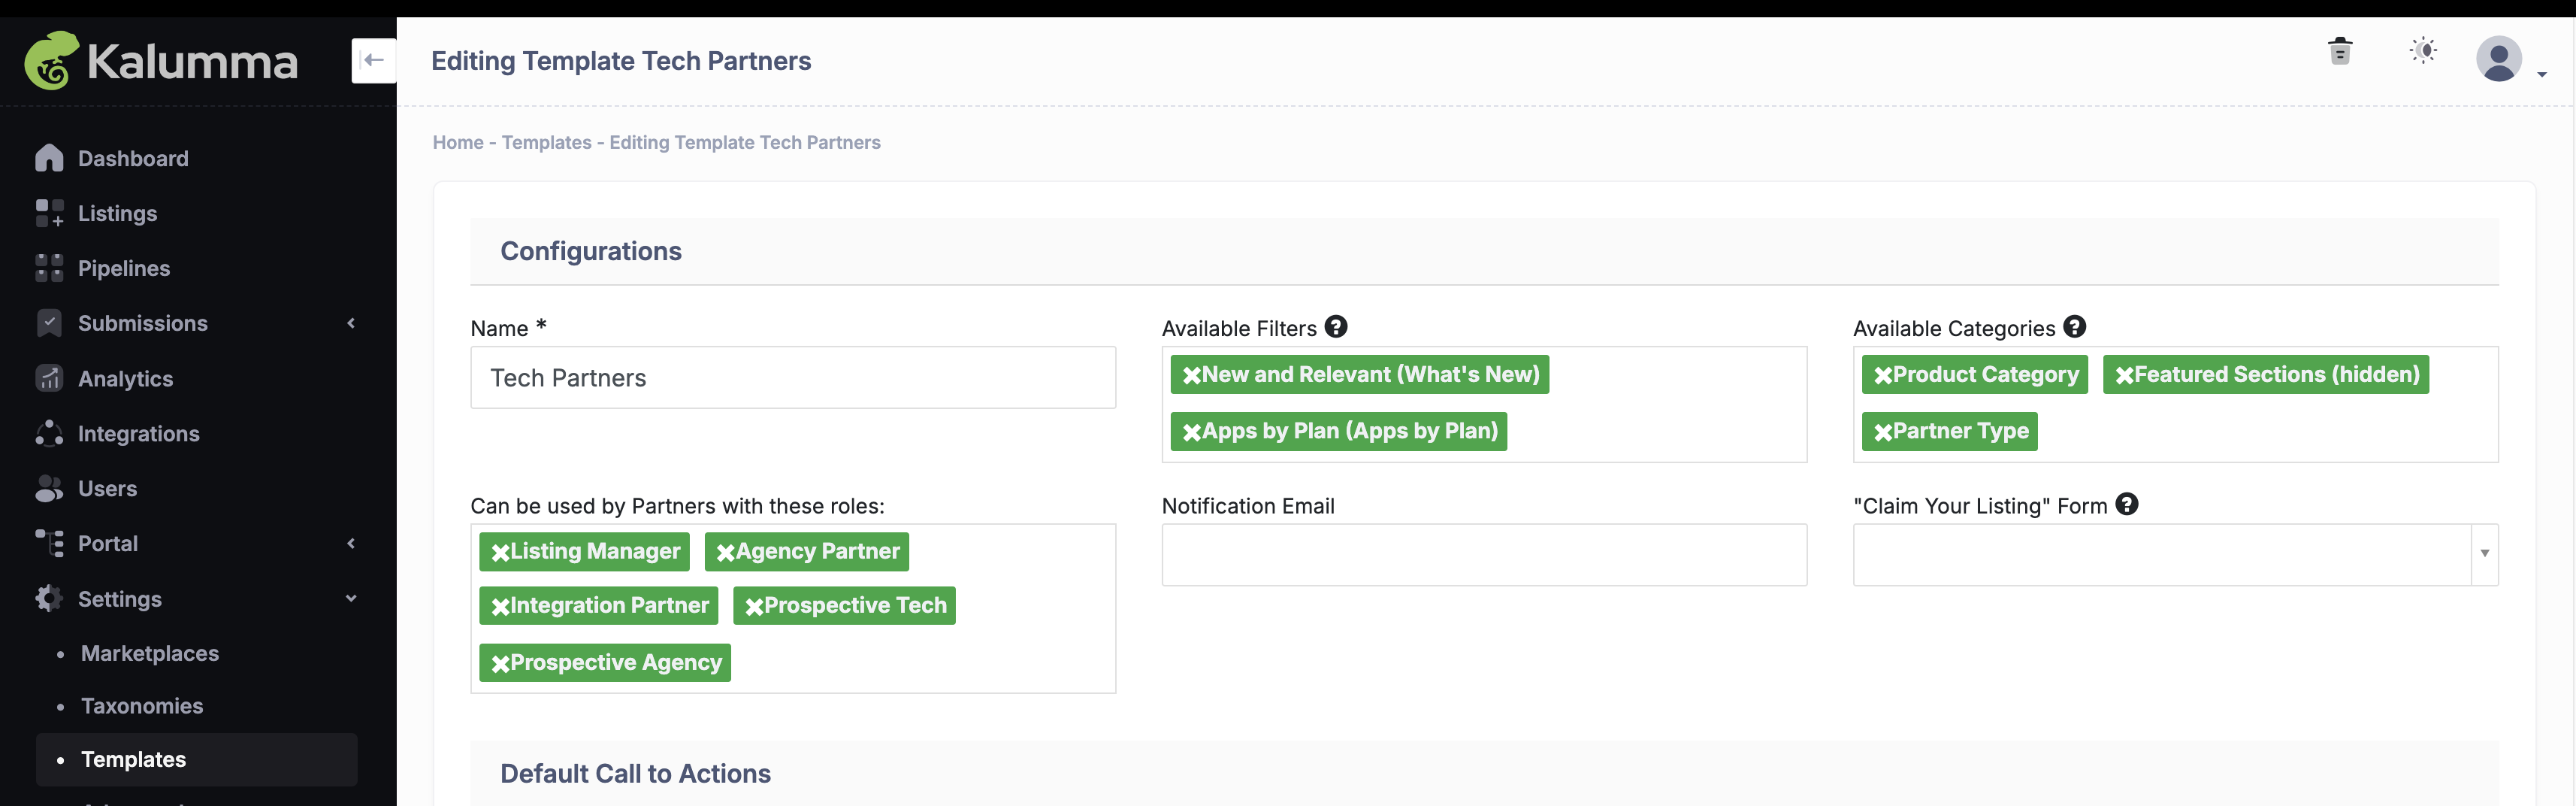
- Navigate to Settings → Templates.
- Choose the template your listings are built from.
- Edit the template and add the filter(s).
This ensures the filter values can be assigned to listings, making them searchable and visible in the marketplace.
✨ Tip: Think of filters in three layers:
- Sidebar Navigation (where users see them)
- Marketplace (where filters are displayed on the homepage)
- Templates/Listings (where filters are applied to content)
Enabling the Filter Badge or Image Feature
The Filter Badge/Image feature allows you to display visual markers (text or images) on partner listings and homepage partner cards. This adds visual interest and helps users quickly identify key partner attributes.
Step 1: Configure Filters
- Navigate to Settings → Taxonomies → Filters.
- Create a new filter (e.g., “Badges”).
- Do not select Use in Sidebar Navigation (badges are intended for card visuals, not navigation).
Step 2: Configure Filter Sections
For each filter section:
- Enter a Section Name (internal) and Display Name (user-facing).
- Select Display Badge on Card.
- Choose one of the following options:
- Show Text → Displays the filter’s Display Name as text on partner cards.
- Show Images → Check Show images instead of text and upload an image for each filter section.
👉 If using images, upload them for each section and save your changes.
Step 3: Apply to Marketplace
- Go to Settings → Marketplaces.
- Edit the marketplace where you want badges to appear.
- Add the new filter to the marketplace configuration.
Step 4: Apply to Templates
- Navigate to Settings → Templates.
- Edit the template that your listings are built from.
- Add the filter and enable List Categories & Filters in Details Section.
Step 5: Assign to Listings
- Open each Listing you want to update.
- Apply the filter(s) to those listings.
Step 6: Verify
- Preview your marketplace or homepage.
- Confirm that text or image badges display correctly on partner cards.
- If multiple badges are assigned, the highest-priority badge will display.
✨ Pro Tip: Use badges sparingly and strategically (e.g., Featured Partner, Certified, Top Integration) to draw attention to key partners and keep your marketplace visually engaging.
Video Walkthrough - How to setup filters
Updated 12 months ago