

Overview
Learn what the Partner Fleet In-App Marketplace is, how setup is organized, and the recommended sequence for configuring it.
Overview & Getting Started
What is the In-App Marketplace?
The In-App Marketplace is one of Partner Fleet's core product modules. It lets you embed a fully branded integrations marketplace directly inside your own application, so your end users can discover, install, configure, and manage integrations without leaving your product.
Unlike a public-facing partner directory that anyone on the web can view, the In-App Marketplace personalizes the experience. It knows who the user is, what plan their account is on, what they've already installed, and what they can access. It uses that context to show the right listings, the right buttons, and the right destinations to each user.
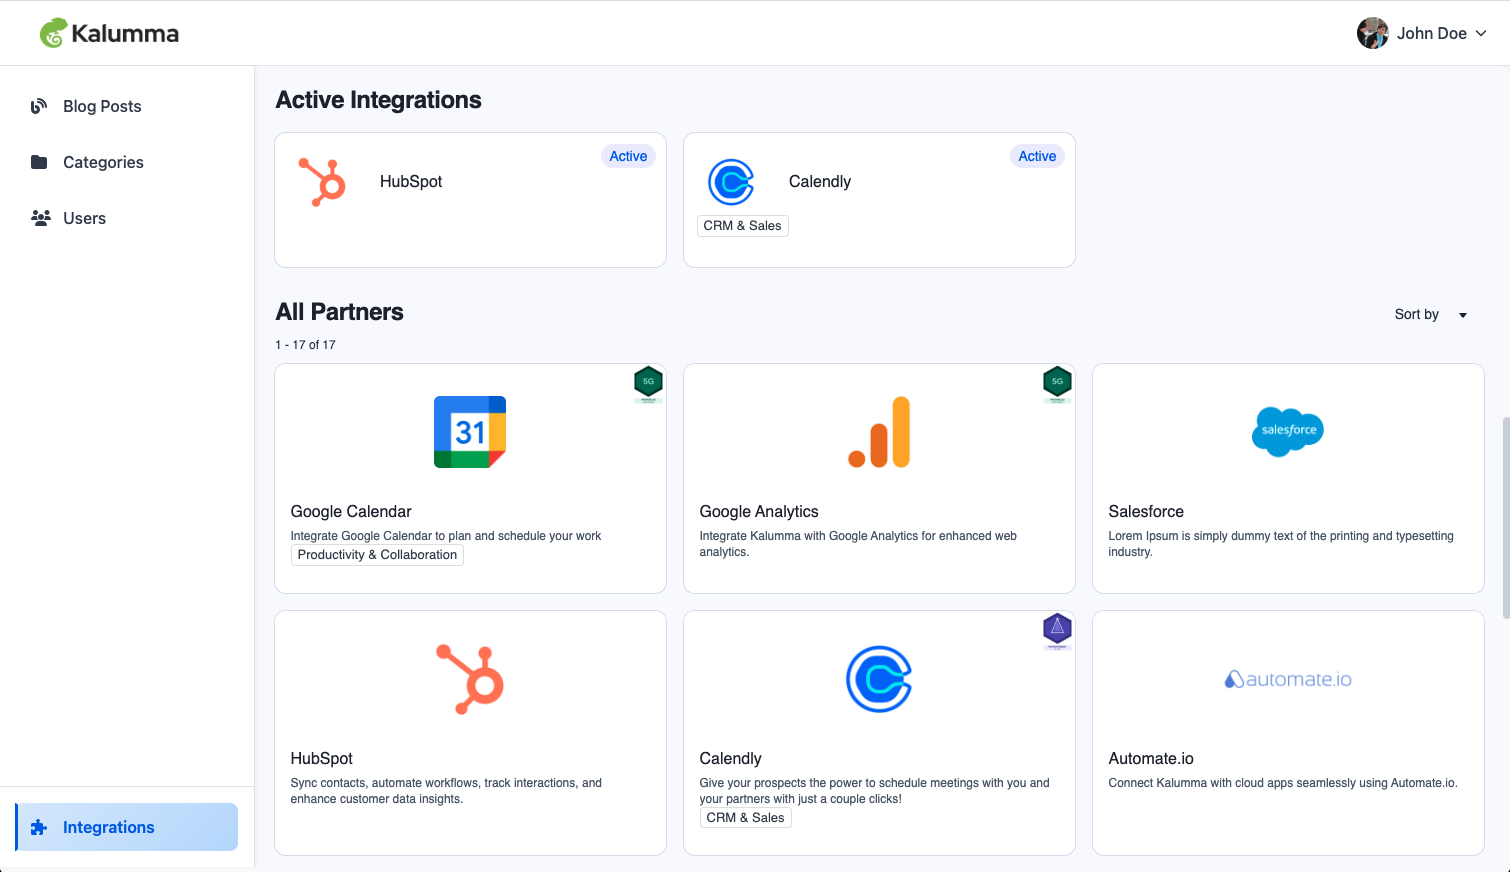
Example In-App Marketplace embedded within an app
Who uses the In-App Marketplace?
Two audiences use the In-App Marketplace:
- Your end-users — your end users who browse the marketplace, install integrations, and manage them. They see the embedded marketplace inside your product.
- Your admin team — partnership managers, platform leads, and operations team members who configure how the marketplace looks and behaves. They use the Partner Fleet admin under Settings > In-App Marketplace.
This documentation is for your admin team. It covers every tab in the In-App Marketplace setup area and how to configure each one.
How Partner Fleet organizes the setup
Everything you need to configure the In-App Marketplace lives under Settings > In-App Marketplace. The setup area has eight tabs, each focused on one area of configuration:
| Tab | What you configure here |
|---|---|
| Appearance | Branding, layout, filter and category settings, languages, pagination — how the marketplace looks. |
| Listings | Which listings from your full Partner Fleet catalog appear in the In-App Marketplace. |
| Audience Filtering | Tag listings with account properties so different audiences see different sets of listings, such as regional integrations only showing to accounts in that region. |
| Buttons & Actions | Map integration statuses to action buttons, customize button labels, and set default destinations for each action. |
| Permissions | Control which accounts and users can install integrations, and what restricted users see when they try. |
| Per-Listing Overrides | Override defaults from Buttons & Actions and Permissions for specific listings that need different behavior, such as Salesforce with a custom approval flow. |
| Test Tools | Generate and decode JWT tokens to validate your authentication setup before going live. |
| Developer Settings | Allowed domains, CNAME, JWT shared secret, embed script, error redirect — the technical configuration that connects your app to Partner Fleet. |
How the setup connects to your product
Three things connect your application to the In-App Marketplace:
- JWT/SSO authentication. Your app generates a signed JWT token containing user and account context, such as email, name, account ID, account properties like tier, and user role. Partner Fleet uses that token to personalize what the user sees.
- Embed script. A small JavaScript snippet on a page in your application renders the marketplace inline. The script handles authentication and communication with Partner Fleet.
- Integration status data. Your app passes the current state of each integration for each user, such as Active, Pending, Error, or Disabled. Partner Fleet uses these statuses to show the correct buttons on each listing.
Your engineering team typically sets up steps 1 and 2 once. Your application handles step 3 alongside the JWT and keeps integration status in sync as users install or modify integrations in your product.
For your engineering lead
If you need to share scope and effort estimates with engineering, the In-App Marketplace Engineering Readiness Brief is a one-page summary written for that audience. Most teams complete the integration work in 8–16 hours.
Recommended setup sequence
New teams should configure the In-App Marketplace in this order. Each step builds on the previous ones.
- Developer Settings — set up Allowed Domains, CNAME, and the JWT shared secret. Your engineering team handles this.
- Test Tools — generate test tokens to validate the JWT setup is working before continuing.
- Appearance — set up branding, layout, and filter/category settings.
- Listings — choose which listings appear in the In-App Marketplace.
- Buttons & Actions — configure default button behavior across all listings.
- Permissions — set up access rules if you need to gate integrations by tier or user role.
- Audience Filtering — set up listing visibility rules if you need different audiences to see different listings.
- Per-Listing Overrides — after you configure the previous settings, override specific listings that need different behavior.
- Embed script implementation — your engineering team adds the embed code to your product.
Working with your customer success contact
Most teams configure the In-App Marketplace with help from their Partner Fleet implementation specialist. The setup is technical and benefits from a guided walkthrough — especially the JWT/SSO and embed script steps. Reach out to your Partner Fleet contact to schedule a setup call before getting started.
Next steps
- Read the article for each tab as you work through setup. Each tab article explains what to configure, why it matters, and common patterns.
- If you have a developer audience, point them to the JWT/SSO Implementation Guide and the Embed Script Implementation Guide for technical details.
- Use Test Tools throughout setup to validate each piece of configuration before moving to the next.
Updated 4 months ago