

Claim Listing
The Claim Listing feature is a low-touch way to invite your partners into Partner Fleet to update and manage their own listings. Instead of the marketplace admin manually creating or editing partner listings, partners can claim ownership of their listing and take responsibility for keeping it accurate and up to date.
How Claim Listing Works
- Setup by Admin
- As the Marketplace admin, you create a Partner Application in Partner Fleet to serve as the Claim Listing form.
- This form ensures that when a partner submits a claim, the request is routed through a structured approval process.
- Claim Listing CTA Appears
- Once enabled, a “Claim Listing” call-to-action (CTA) automatically appears on all listing pages associated with the template where you’ve turned this feature on.
- Partners browsing the marketplace can click this CTA to initiate the claim process.
- Partner Submits Claim
- The partner uses the Claim Listing form to request ownership of their company’s listing.
- Admin Review & Approval
- Every claim must be approved by you, the Marketplace admin owner.
- This ensures you’re notified and can confirm that the right person at the right company is managing the listing.
- Partner Access Granted
- Once approved, the partner gains the ability to log in and manage their listing directly from Partner Fleet.
Setup Instructions
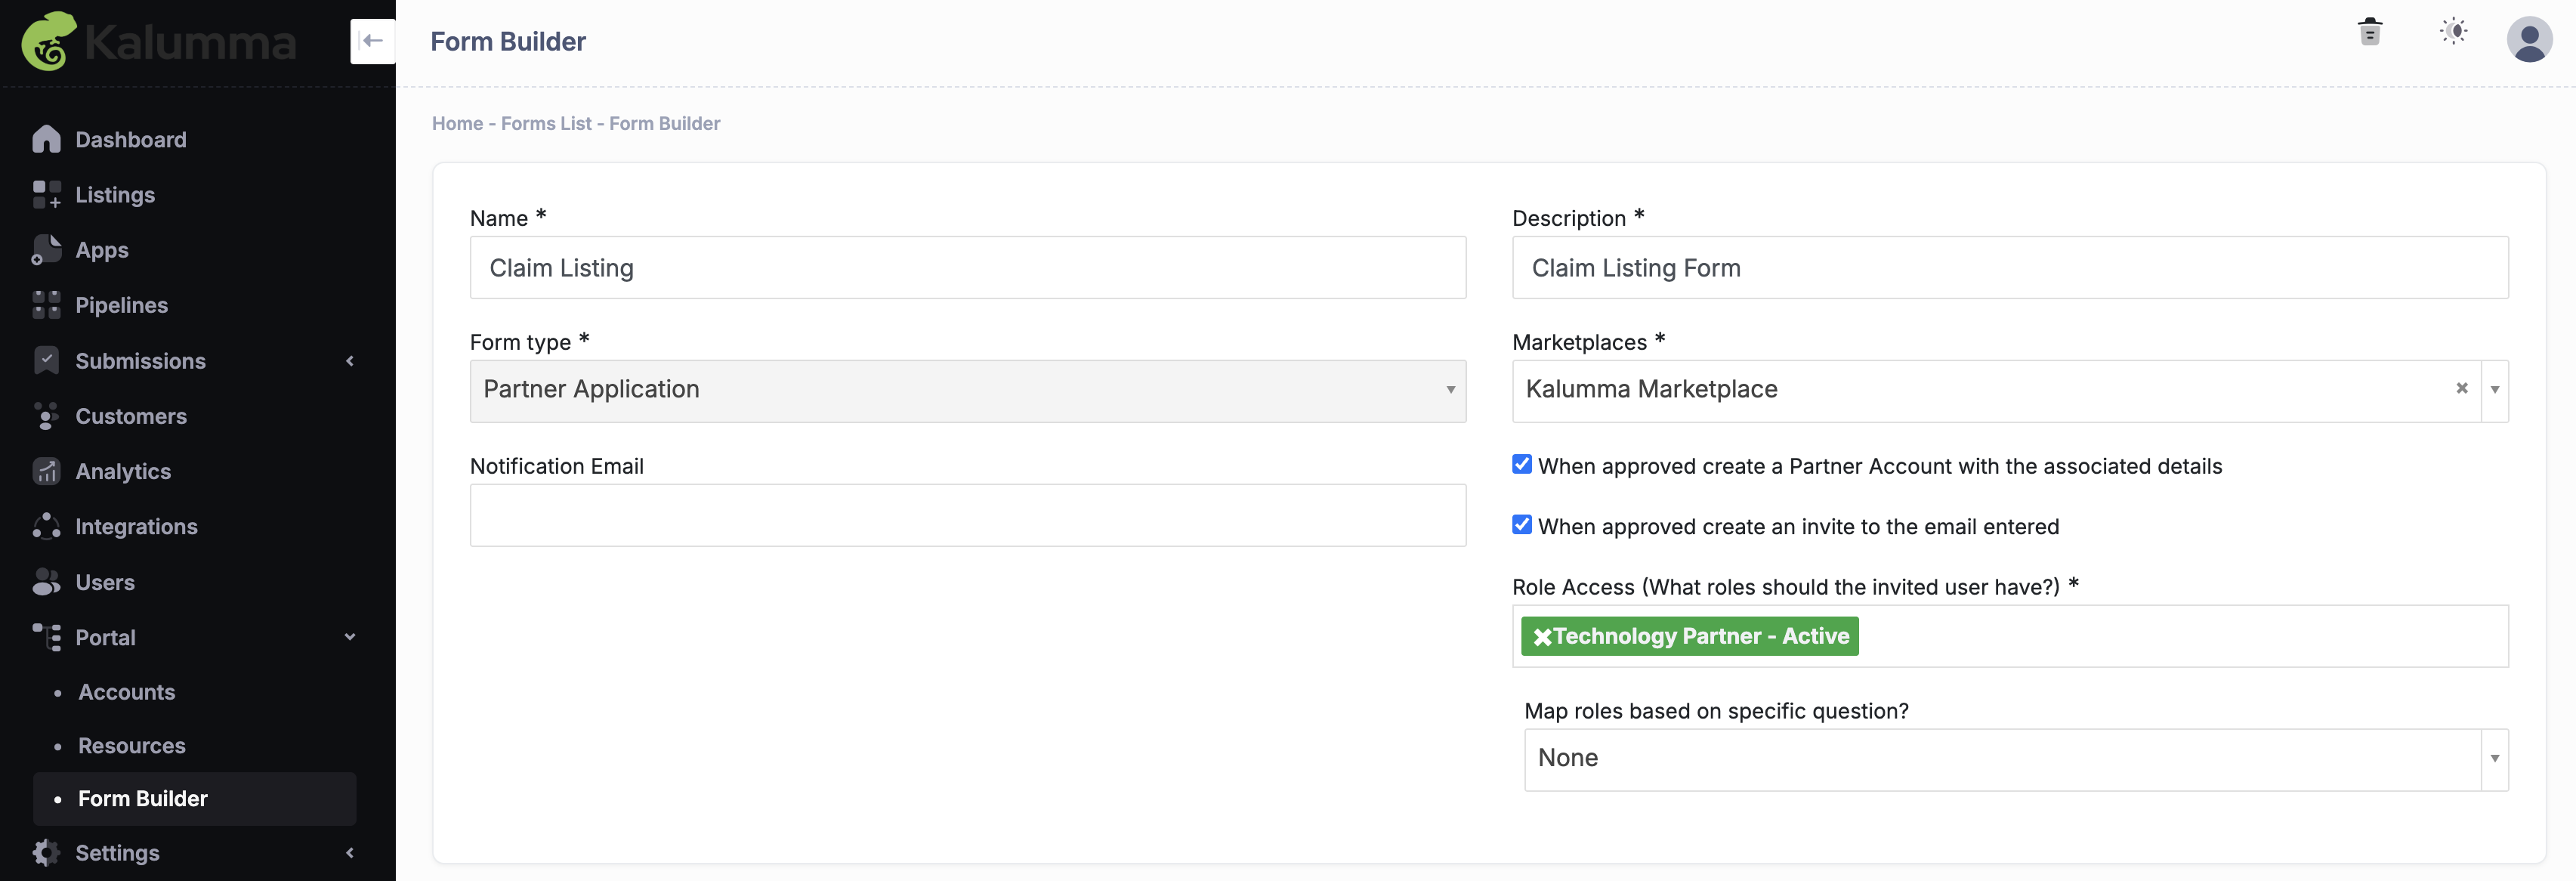
Step 1: Create a Partner Application
- Go to Portal > Form Builder
- Click + New Form.
- Select Partner Application
- Name it something like Claim Listing Form.
- Add the 5 mandatory Partner Application fields
- User Field -> First Name
- User Field -> Last Name
- User Field -> Email
- Partner Field -> Company Name
- Partner Field -> Company Website
- Add any fields you’d like partners to complete before approval (e.g., role, phone number, verification notes).
- Save the application.
Step 2: Enable Claim Listing on a Template
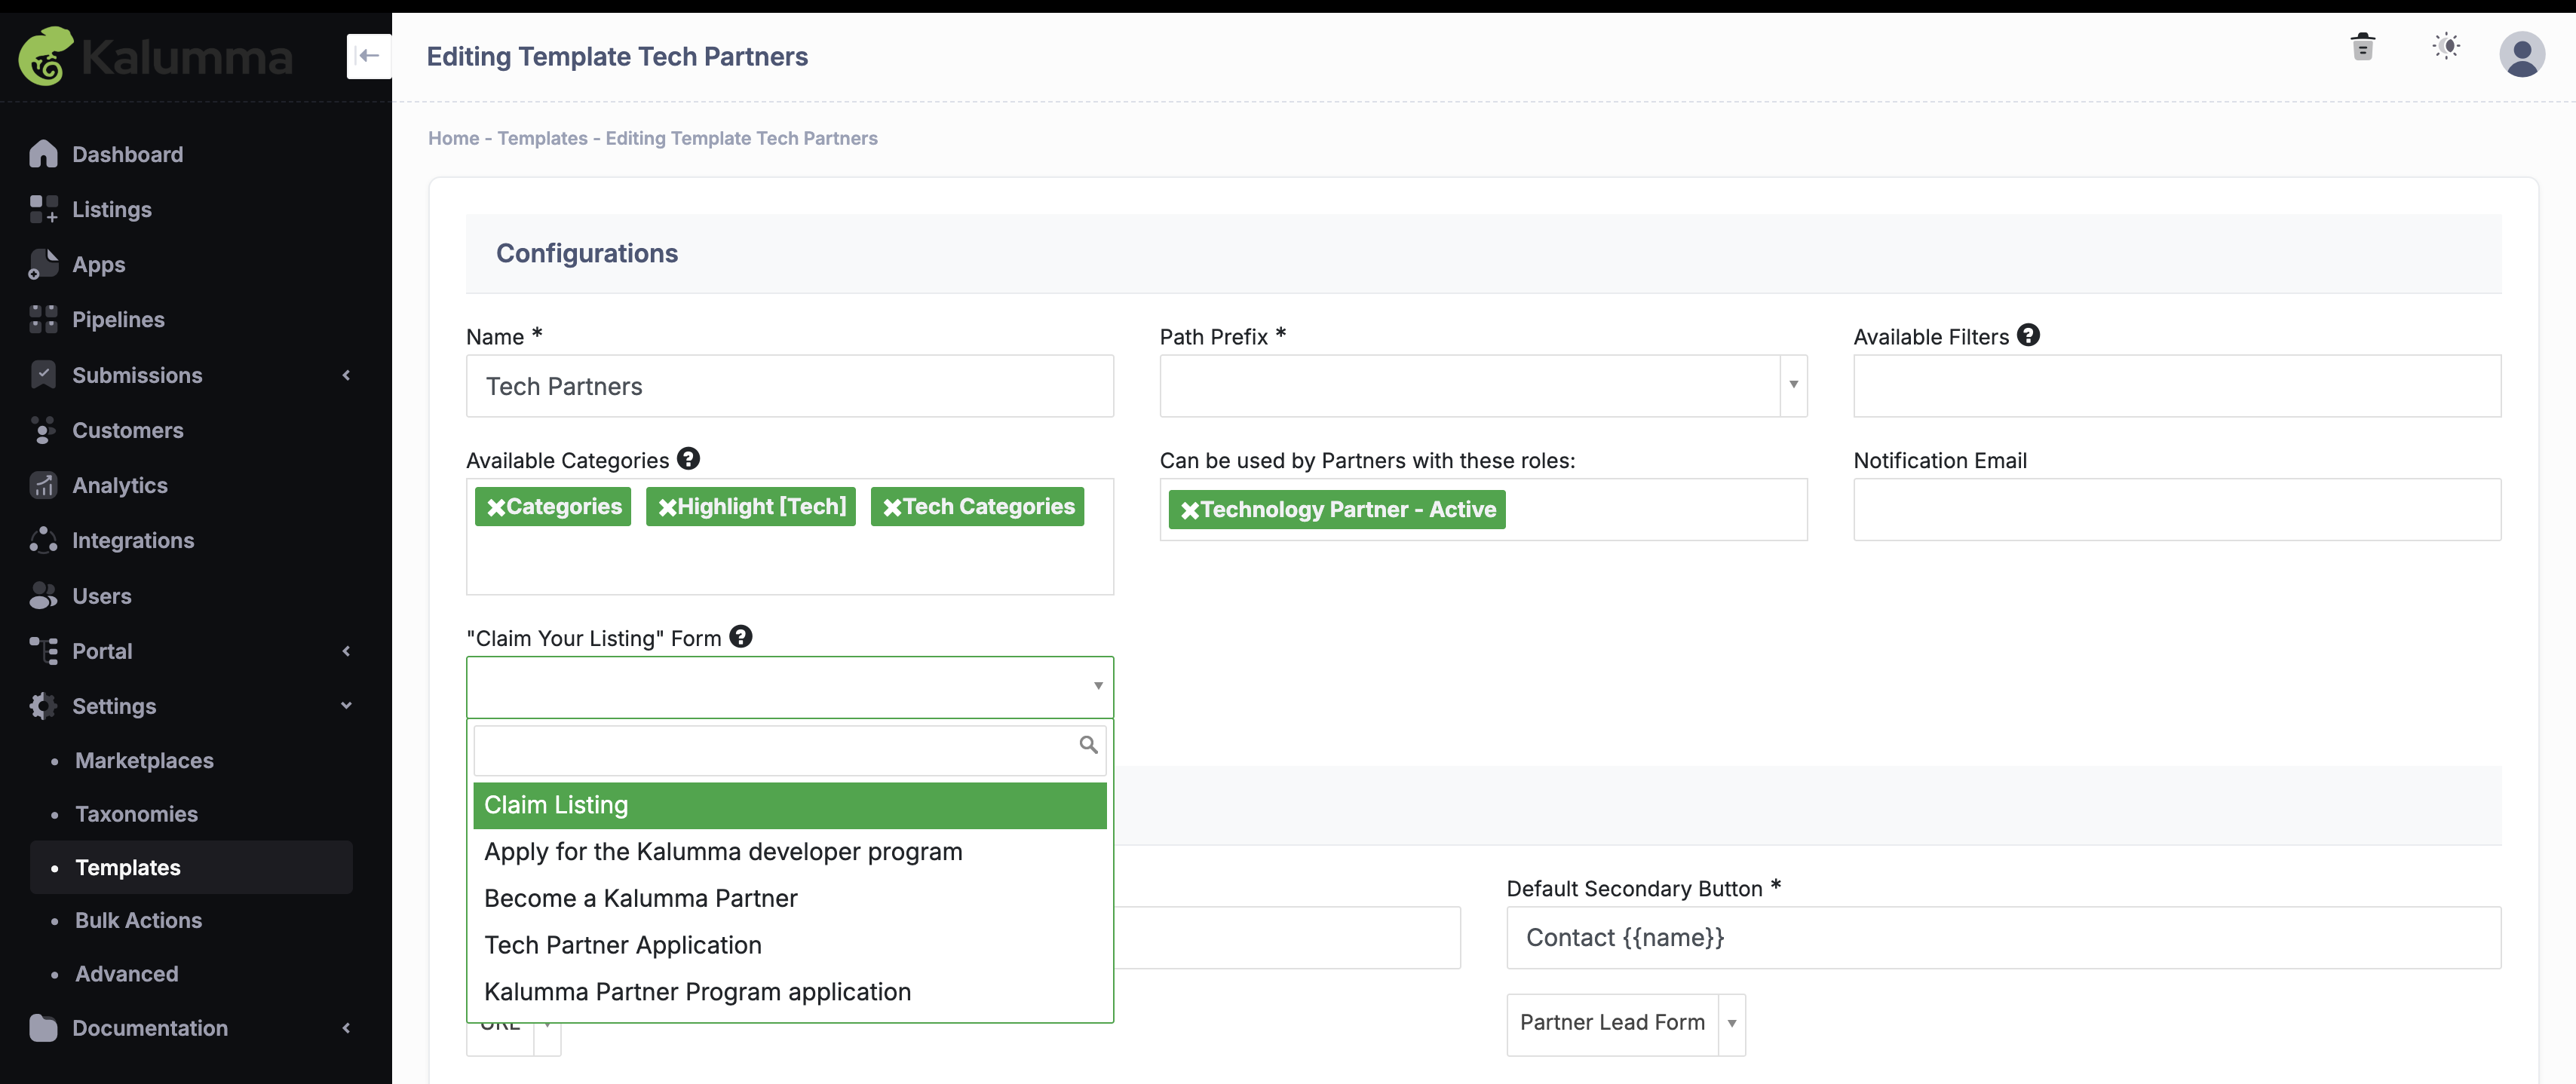
- Navigate to Settings > Templates.
- Select the listing template where you want to allow Claim Listing.
- Choose the Partner Application you created to be used as the claim form.
- Save your changes.
Step 3: Confirm CTA Placement
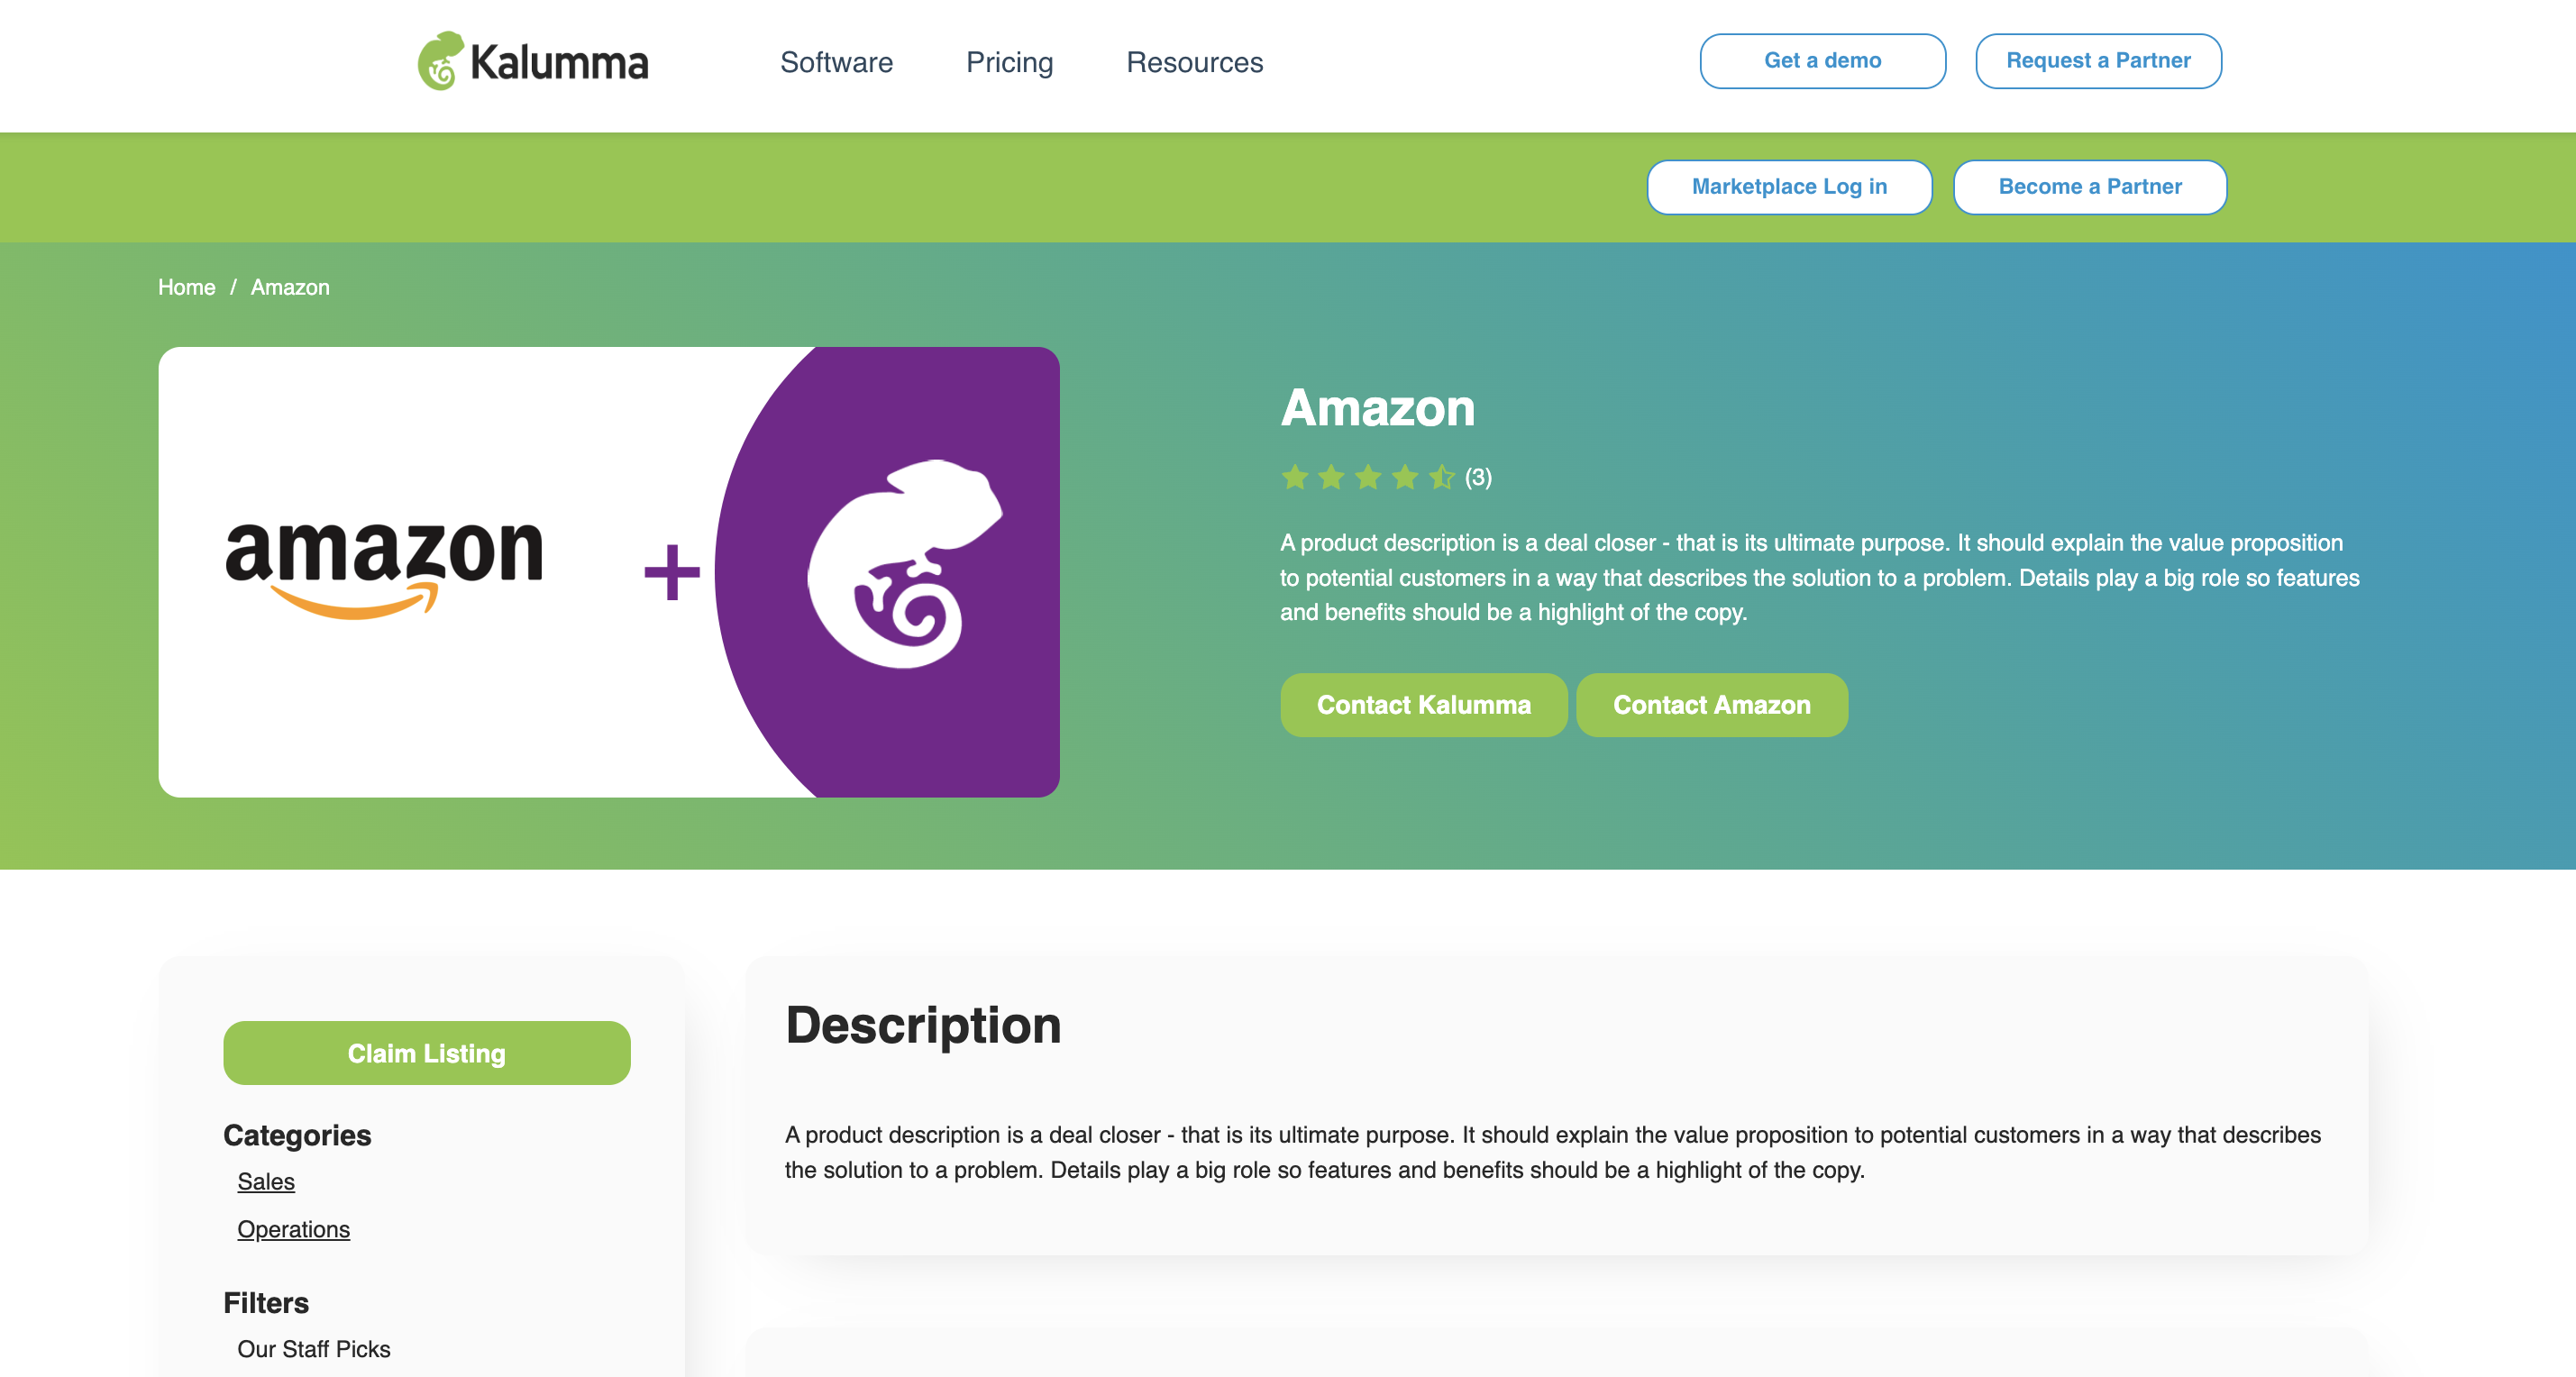
- Visit a listing that uses the enabled template. By default, the Claim Listing CTA will appear at the top of a listing page sidebar.
- Confirm the Claim Listing button appears automatically on the page.
Step 4: Test the Workflow
- Submit a test claim using the form.
- Verify that the claim routes to admin approval before access is granted.
Why Use Claim Listing?
- Streamlines Partner Onboarding: Partners can self-serve into Partner Fleet with minimal admin effort.
- Ensures Data Accuracy: Partners manage their own listing details, keeping information fresh and correct.
- Maintains Admin Oversight: Approval workflow prevents unauthorized users from editing listings.
- Saves Time: Reduces back-and-forth with partners for content updates.
Key Considerations
- Admin Approval Required: Every claim must be approved by the Marketplace admin before access is granted.
- Form Customization: You can customize the Partner Application form to collect any information you need before approving ownership.
- Single Claim per Listing: A listing can only be claimed by one partner, additional partners can be added at the account level once their application has been approved.
- Feature Availability: If you don’t see the Claim Listing feature in your Admin view, please reach out to your Customer Success Manager for support.
Updated about 1 year ago
Did this page help you?