

Hubspot Integration
HubSpot Integration Guide
Enable the Partner Fleet -> HubSpot integration so your marketplace leads flow directly into HubSpot as contacts, companies, or deals. This guide walks you through setup, field mapping, custom fields, and testing.
You can connect Partner Fleet to HubSpot using OAuth. After doing so, you’ll map how data flows from Partner Fleet into HubSpot.
Setup Steps
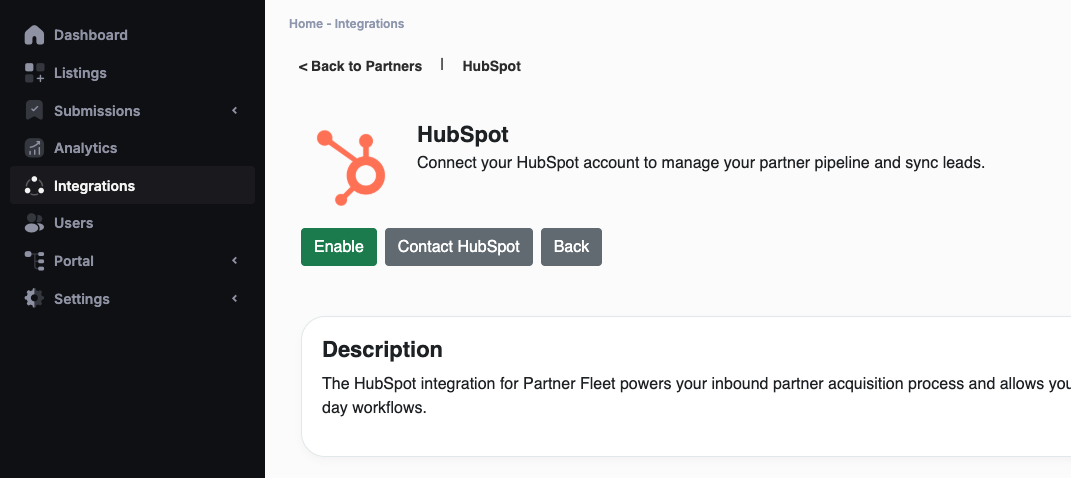
- Go to Admin → Integrations → HubSpot in your Partner Fleet dashboard.
- Click Settings and then Enable to sign into your HubSpot account to authorize the integration.
- Once connected, you’ll be redirected to the field-mapping section to complete configuration.
Field Mapping Reference
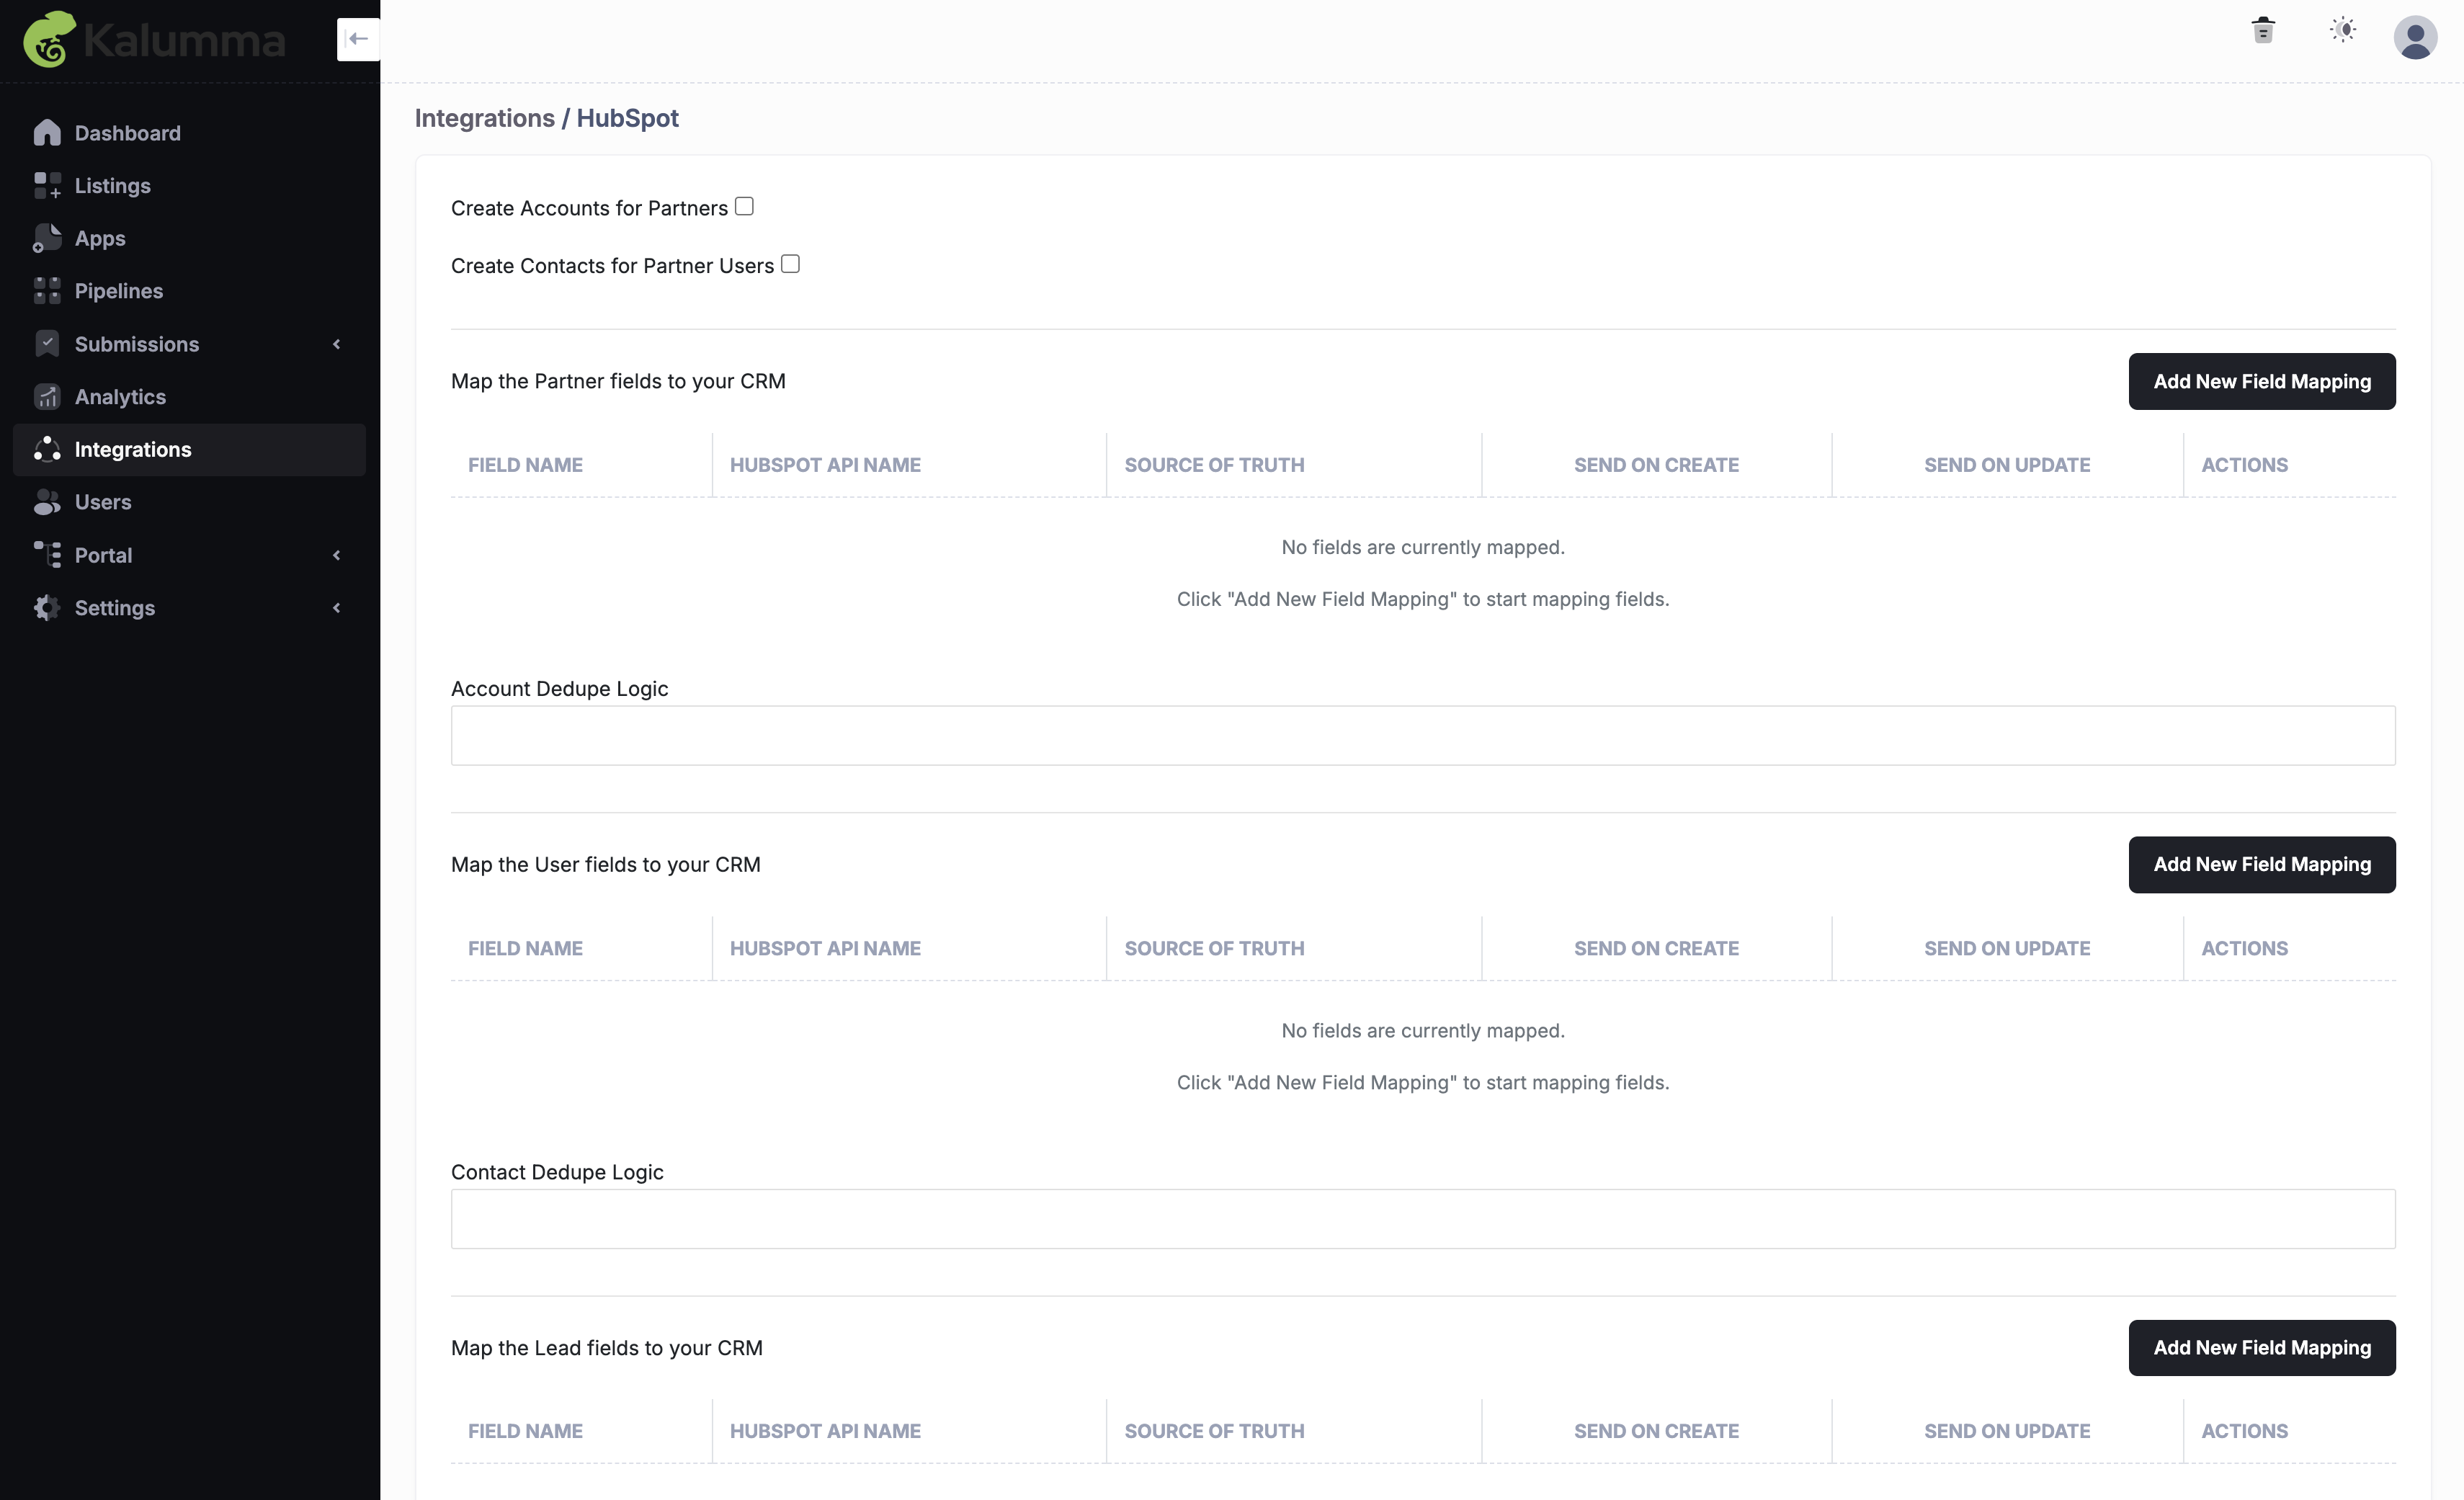
After OAuth, define how data from your marketplace maps into HubSpot objects:
| Partner Fleet Entity | HubSpot Object / Action | Typical Mappings / Use Cases |
|---|---|---|
| Partner (Account) | Company / Organization | Map name, website, “about us”, state/status, etc |
| Partner User / Individual | Contact | Map first name, last name, email, etc. |
| Lead / Submission | Lead / Deal / Contact (as configured) | Map standard CRM fields (name, email, company, job title, etc.), depending on your workflow |
How to Add a New Field Mapping
- Click Add New Field Mapping
- Choose the Partner Fleet field
- Enter the HubSpot property API name
- Choose sync triggers:
- Send on Create
- Send on Update
- Or both
- Save the mapping
Repeat for as many fields as needed.
See Screenshot
Optional: Creating Custom Fields in Partner Fleet
If you want to sync unique marketplace data that doesn’t map to standard HubSpot properties, add a custom field to Partner Fleet.
Steps to Create Custom Fields
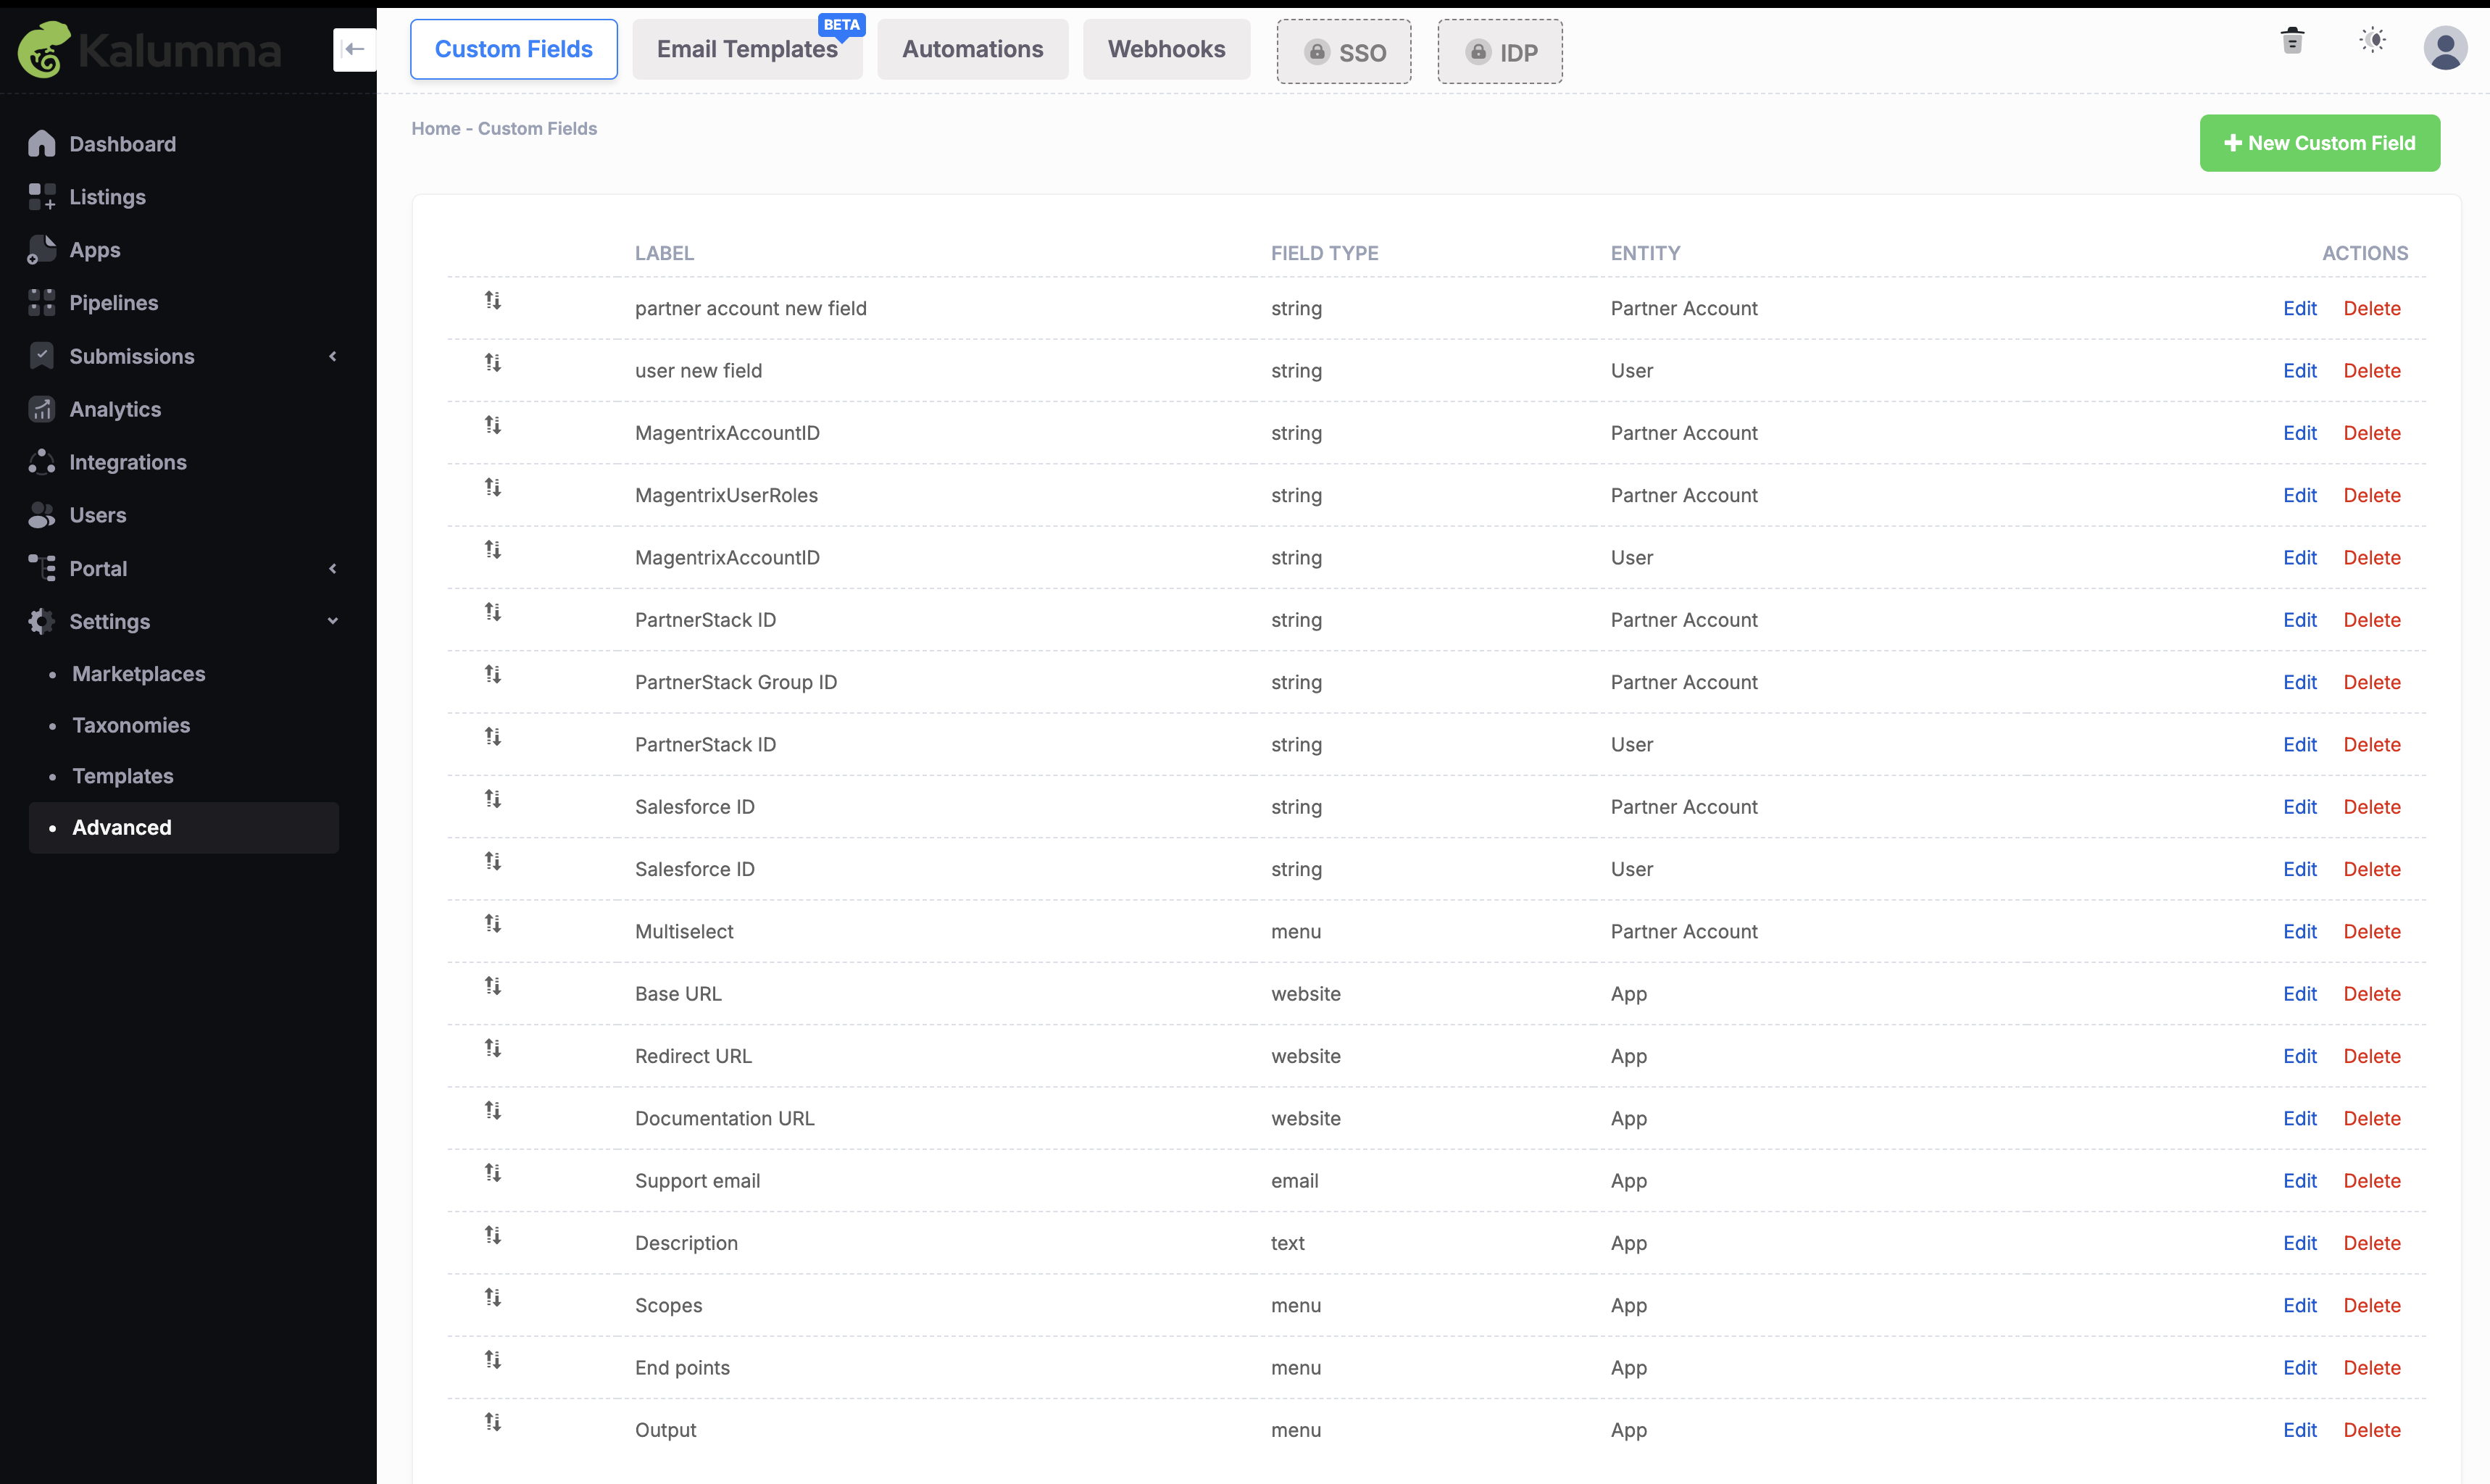
- Go to:
Admin → Settings → Advanced → Custom Fields - Click + New Custom Field
- Enter Label, select Field Type, and choose Entity (Partner, User, Lead)
- Save the field
- It will now appear in the HubSpot mapping dropdown list
This is commonly used for custom lead questions, partner tiers, categories, or internal notes.
See Screenshot
Testing & Validation
Once your mappings are configured:
Step 1: Submit a Test Lead or Application
- Use your live marketplace or staging environment
- Fill out a test listing lead form with your own email
Step 2: Verify Results in HubSpot
- Confirm the Contact/Company/Deal appears with expected field values
- Check whether custom property mappings populated correctly
Troubleshooting
❗ I don’t see data syncing into HubSpot
Confirm:
- OAuth connection is active
- HubSpot properties exist and API names match exactly
- Required fields in HubSpot (e.g., email) are included in the mapping
- The entity has all required data populated
❗ A field is not syncing
The most common causes:
- Incorrect HubSpot field API name
- Required HubSpot field constraints
- Field type mismatch (e.g., text vs number)
- Sync triggers not enabled (Create/Update)
❗ Custom fields aren’t showing in the mapping list
Ensure:
- You created the custom field under the correct Entity
- It was saved successfully
- You refreshed the mapping section
Updated 10 months ago