

Basic Integration Guide - Embedded Solution
This guide covers the fundamental implementation of our embedded solution. This is the simplest way to get started with our platform.
Initial Setup and Configuration
This guide walks you through the initial setup process for the Partner Fleet In-App Marketplace.
Marketplace Provisioning
Partner Fleet will provision your In-App marketplace instance. Once provisioned, you'll find your Marketplace configuration panel at:
Settings > Marketplaces > In-App MarketplaceIn this section, you can customize your marketplace experience by configuring:
- Filters
- Taxonomies
- Sort options
- Layout styles
- Customer design elements
Domain Configuration
Domain Whitelisting
Before implementation, you must add your domains as whitelisted domains:
- All domains where the marketplace will be embedded
Settings > Marketplaces > In-App Marketplace > Valid URLs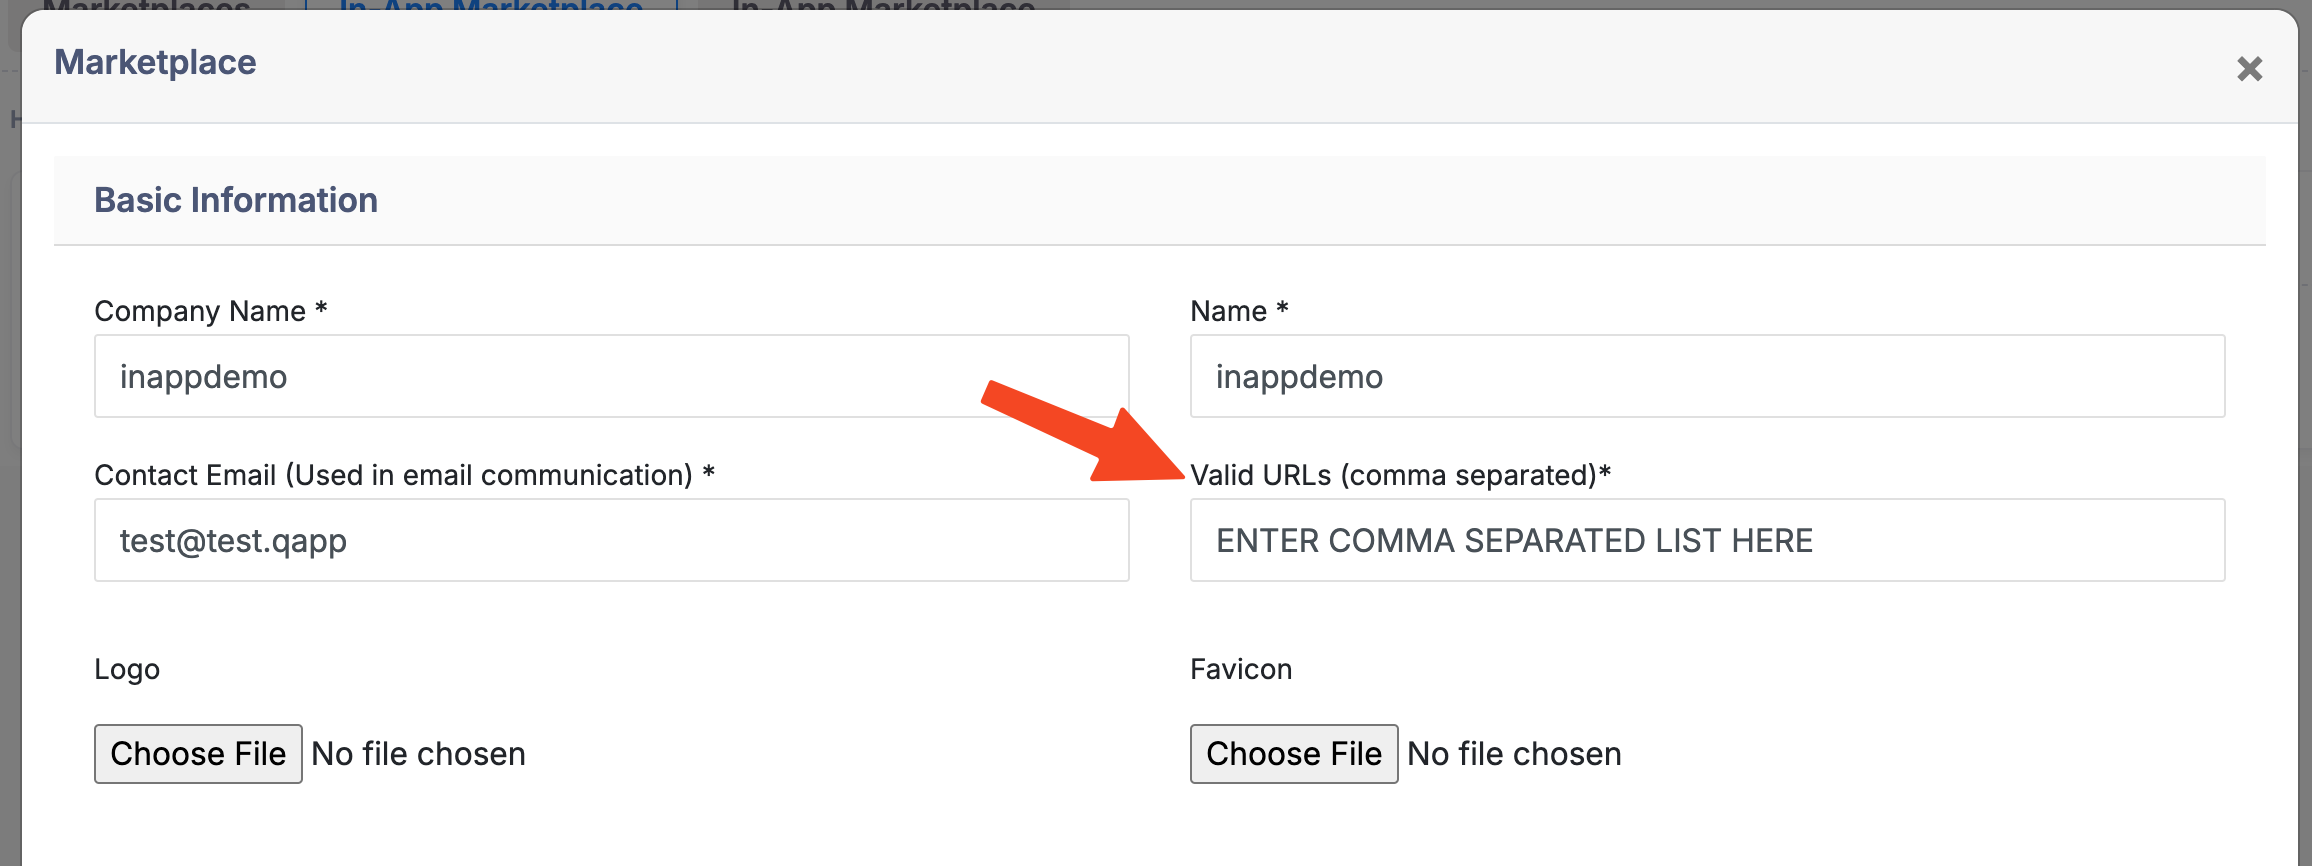
ImportantThis is a critical security step. Partner Fleet implements Content Security Policy (CSP) restrictions to ensure your marketplace can only be embedded on approved domains.
In-App Domain Setup (Optional)
Before go-live, you'll need to:
- Set up a CNAME to the marketplace on your own domain
- Example:
inapp.company.com
NoteThis ensures all data is served by your domain and avoids any cross-domain issues.
Quick Start
For the most basic implementation you can copy the preview code:
Settings > Marketplaces > In-App Marketplace > Preview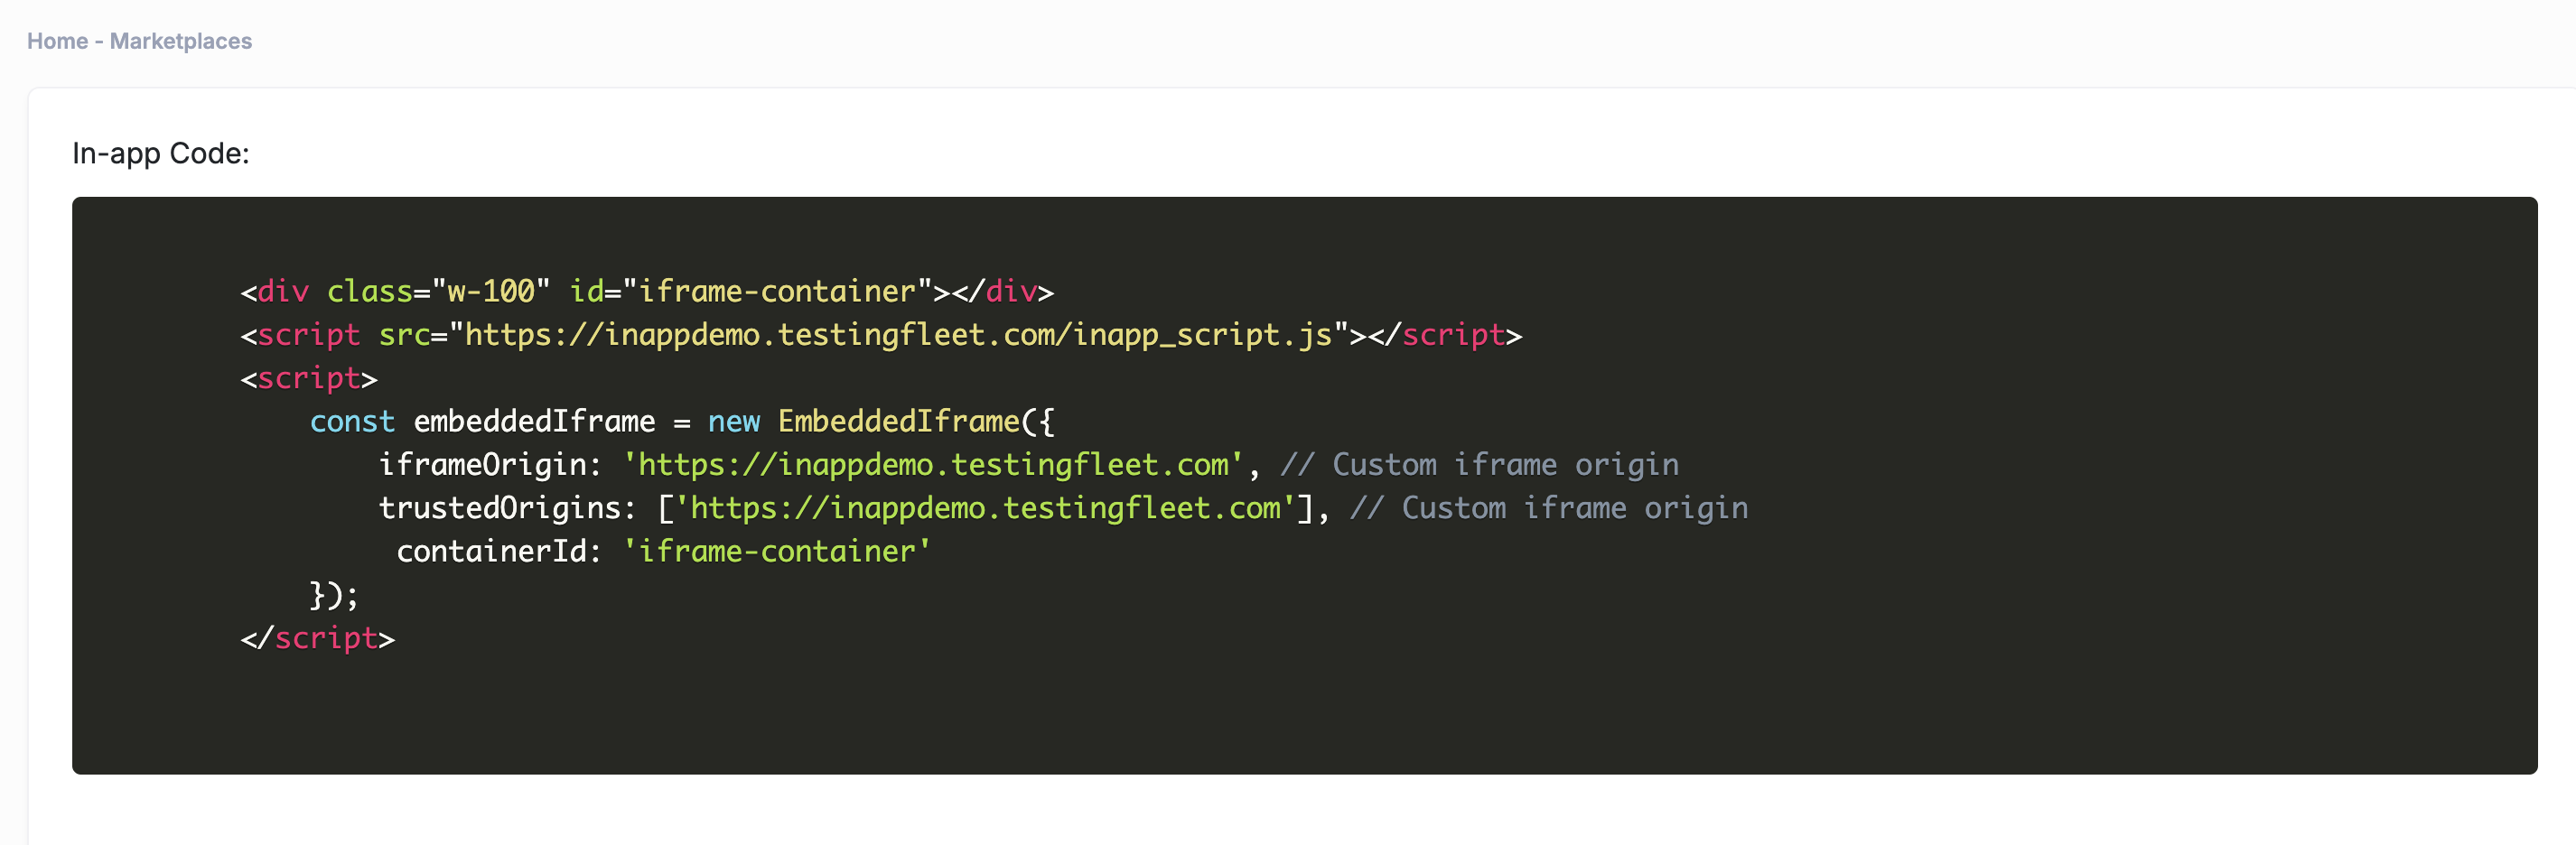
Or use the following code as an example and add it to your page where you want the solution to appear:
<!-- 1. Create a container for the iframe -->
<div class="w-100" id="iframe-container"></div>

<!-- 2. Add our script -->
<script src="https://your-partner-fleet-domain/inapp_script.js"></script>

<!-- 3. Initialize the iframe -->
<script>
    const embeddedIframe = new EmbeddedIframe({
        iframeOrigin: 'https://your-partner-fleet-in-app-domain',
        trustedOrigins: ['https://your-partner-fleet-in-app-domain'],
        containerId: 'iframe-container'
    });
</script>
Configuration Options
Required Parameters
| Parameter | Type | Description |
|---|---|---|
iframeOrigin | string | The base URL of our application |
containerId | string | ID of the div where the iframe will be mounted |
HTML Container Requirements
The container element:
- Must have a unique ID
- Should have a defined width (either via CSS or class)
- Should have a defined height if parent element height is not set
Example with custom dimensions:
<div id="iframe-container" style="width: 100%; height: 600px;"></div>Basic Implementation Steps
-
Add Container
<div class="w-100" id="iframe-container"></div> -
Include Script
<script src="https://your-partner-fleet-domain/inapp_script.js"></script> -
Initialize
const embeddedIframe = new EmbeddedIframe({
    iframeOrigin: 'https://app.yourdomain.com',
    containerId: 'iframe-container',
    trustedOrigins: ['https://your-partner-fleet-in-app-domain']
});
Security Considerations
-
CSP Headers
If your site uses Content Security Policy (CSP), add our domain:frame-src https://your-partner-fleet-in-app-domain; script-src https://your-partner-fleet-in-app-domain; -
HTTPS
- Our script must be loaded over HTTPS
- Your page must be served over HTTPS
Testing Implementation
- Check browser console for any errors
- Verify iframe loads correctly
- Confirm iframe is responsive to container size changes
Common Issues
-
Iframe Not Appearing
- Verify container ID matches configuration
- Check container has dimensions
- Confirm no CSP blocking
-
Script Loading Error
- Verify HTTPS protocol
- Check domain spelling
- Confirm script URL is accessible
-
Sizing Issues
- Add explicit dimensions to container
- Check parent element sizing
- Verify no conflicting CSS
For additional support or advanced features, contact our support team.
Updated 4 months ago